For our air quality monitors we have now worked with three different mold makers in China and learned a lot. I would like to share our experiences and give some tips. We made three plastic injection molds so far, one for our indoor monitor, one for our outdoor monitor and a small one for some accessories parts. All of the molds turned out well but we also made a few mistakes along the way. Here are the key takeaways:
Design your Plastic Part from the Start with Mold Suitability in Mind
From the very start of your design phase, it is highly recommended that you (or your designer) has some knowledge about mold making and can make design choices that make the mold simpler to produce. So for example:
- If possible avoid undercuts in your design. Undercuts are for example if you need holes on the side of a plastic enclosure. Often you cannot completely avoid undercuts but then you need a slider which is typically not too difficult to do but it adds to the mold costs.
- Avoid changes in thickness of the plastic as this can often lead to marks on the plastic as the plastic cools down differently
- Think about the parting line in your design. The mold consists of two parts, cavity and core. Often when the two parts come together, a small line will be visible on the plastic. So it’s important to think in your design where you want to have this line
- You cannot have 90 degrees in your mold. For the mold to exit your plastic part, it needs to have a slight angle of a few degrees. This is why you will see most plastic parts not have 90 degree angles but slightly wider. Think about how a plastic bucket becomes slightly wider at the top.
There are many more small things to consider but above are important at an early design stage. You will also find a lot more detailed information on this on Google so I kept the above quite brief.
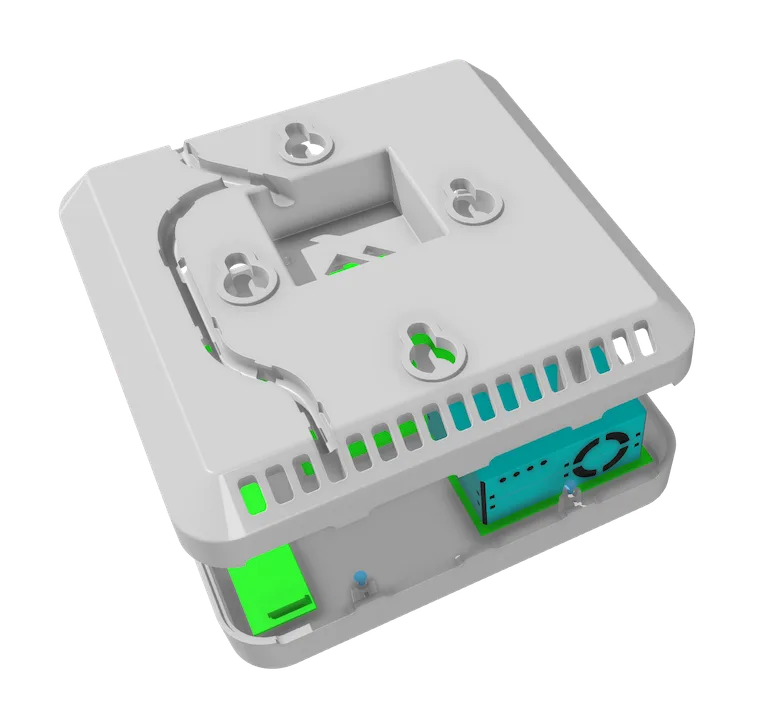
For our indoor air quality monitor, we were able to make a very nice design of the enclosure with a very simple mold design that did not need any sliders or lifters and was a family mold.
Here is how the enclosure looks like (from the back side):
Hire your Own Mold Expert Early On
This was probably one of the most important decision we made and avoided many problems. We hired a highly proficient mold expert, a mechanical engineer with many years mold making experience as a consultant (contact me and I can connect you with him). He accompanied us from the design stage, through the mold making process until we had the first plastic parts completed. Especially he was responsible for:
- Reviewing and suggesting changes during the design phase to have an easier (and cheaper) mold. Often these changes can be quite subtle but have a big effect.
- Reviewing and commenting on the quotes you get from the mold makers
- Running independent mold flow analysis in order to detect potential problems of the plastic parts (e.g. warpage or stress/sink marks)
- Reviewing the complete mold 3D. This is the 3D model of the complete mold design made by the mold maker. It includes all parts of the mold including things like cooling lines, lifters, ejector pins, injection gates, inserts etc.
At this stage a good expert can ensure that you have a long lasting mold and also suggest certain important designs if e.g. you need to make future adjustments.
Chinese Mold Maker Business Model
Many Chinese mold makers run a similar business model which I actually quite like as you know beforehand exactly the price you will pay. They offer both, the making of the mold as well as the production of the plastic parts. In many cases this then includes warranty of the mold and they will repair it for free in case something breaks. You will get a quote from the beginning that includes not only the cost of the mold but also the cost of the plastic parts. Ask for prices for different quantities, e.g. 1000, 5000, 10.000 units at this stage so that you have a reference.
It is important that you clarify with the mold maker who exactly owns the mold because often they keep this opaque and call it a “contract mold”. This means that the mold maker assumes you do the plastic production with the same company and not move the mold out to a different factory. I believe they often subsidize mold making with a bit more expensive plastic parts and thus would make a loss if the mold is not used.
I strongly recommend that you make a mold contract with the mold maker to clarify who owns the mold and for what costs you could transfer it out. In our mold contract, we defined a certain number of plastic parts that we produce with the mold maker and then a price to completely purchase it in case we want to move it somewhere else.
Typically you do a 50% payment at the start of the contract and pay the remaining when the samples have been approved. The molds we made took around 2 months to produce if there are no problems during the production process.
The Mold Production Process
Typically the milestones in the mold production process are the following.
Analyzing the Design, Design for Manufacturing
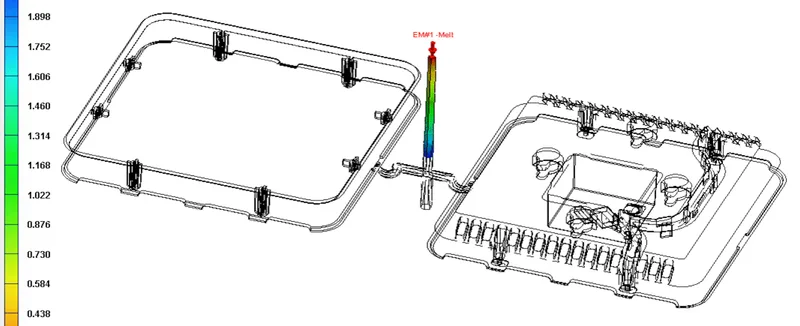
The mold maker will analyze the design (typically the STEP file) and make recommendations for improvements, e.g. changing some thickness, adding draft angles, definition of the parting line etc. It is also recommended that they do a mold flow analysis and identify certain problem areas, e.g. warpage.
Here is a picture of a mold flow simulation of the enclosure of our indoor air quality monitor:
Creating the Mold 3D
Once you have approved the changes, the mold maker will create a 3D drawing of the complete mold. This includes all parts, including cooling lines, ejector pins etc. It is super important that you review in depth this mold 3D with your own expert as sometimes mold makers try to do shortcuts that save them money but could create problems later on. Once you approve the mold 3D it is often very difficult and expensive to make even simple changes. So spend time and resources on this mold 3D approval.
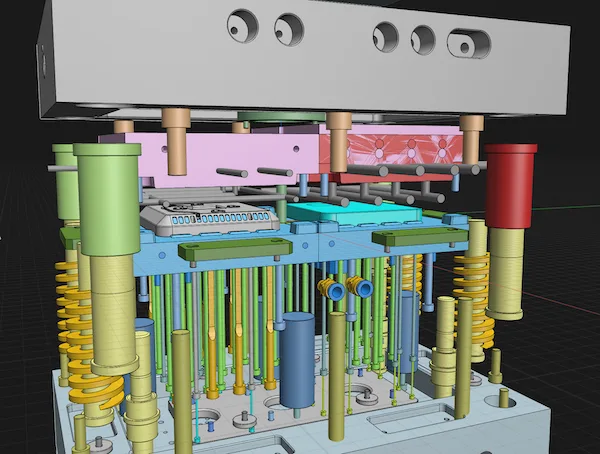
So even though the plastic part is very simple, the mold looks already quite complex.
Mold Production
Here the mold maker will follow the mold 3D and manufacture the mold. In our cases that took a round a month and typically there is not much interaction with the mold maker necessary. So you have some free time to concentrate on other things!
T0 Sample
T0 defines the first plastic samples produced by the mold. It is typically without texture yet. The purpose of the T0 is the following:
- See if the dimensions are right, e.g. your PCB fits into the enclosure
- Check that it closes tightly
- Check that the screw bolts work nicely
- Check for any warpage
- Check for any stress marks
- Check for any sinkmarks
Similar to the mold 3D, it is super important to test the T0 thoroughly. So make sure that the mold maker actually sends the real sample to you so that you can check it. Look extremely carefully for any visual shortcoming of the mold and also test it functionally.
Depending on your findings, the mold maker might repeat the T0 stage until everything is ok.
T1 Sample
T1 typically is the production ready sample with the texture applied. Check this sample that the texture is applied evenly and that there are no other visual impacts, e.g. from uneven polishing of the mold. In the T1, you should also check that the color exactly matches your requirements.
Once you are happy with the T1, you can start the plastic part production.
Plastic Part Production
I would normally recommend to first not do too many parts (maybe 500-1000) so that you can get some hands-on experience with the parts. Sometimes you might want to have some small changes made, before going into larger batches.
If you need some logo printed on the enclosure, the factory can often provide this and we had good results with this. It is often easier to get it organized by the factory than sending the enclosures by yourself for printing.
Here is a video from our indoor plastic enclosure coming out of the injection machine.
Your browser does not support the video tag.In the End
I think in general we had very good experiences with Chinese mold makers and we are very happy with the results and the quality of our enclosures. Probably one of the key factors for success is to make sure you have your own expert on hand to have an independent opinion in case certain decisions need to be made.
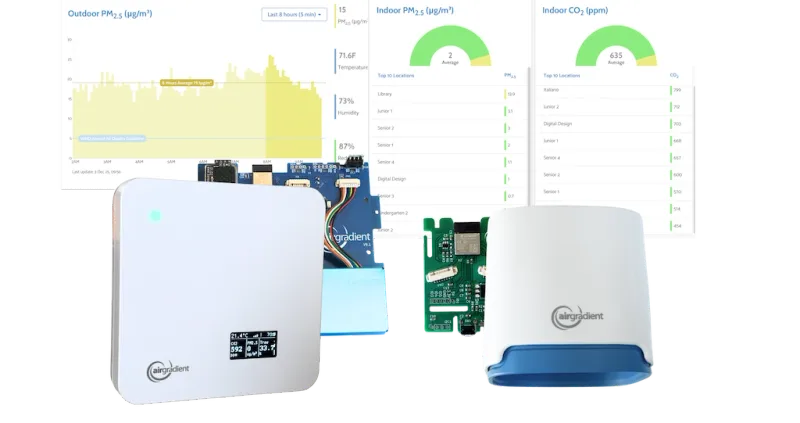
If you want to get the exact enclosure as per the images above (and an open-source air quality monitor), you can order one of our indoor air quality monitors.
Also, feel free to reach out to me if you want to get some recommendations for a mold expert or specific mold makers in China.