Understanding the LED Indicators on Your AirGradient ONE
Understanding the LED Indicators on Your AirGradient ONE
The AirGradient ONE has a row of 11 LEDs behind the plastic at the top of the device. These LEDs convey important information to the user - namely, monitor status and pollutant concentrations. They can be split into two groups.
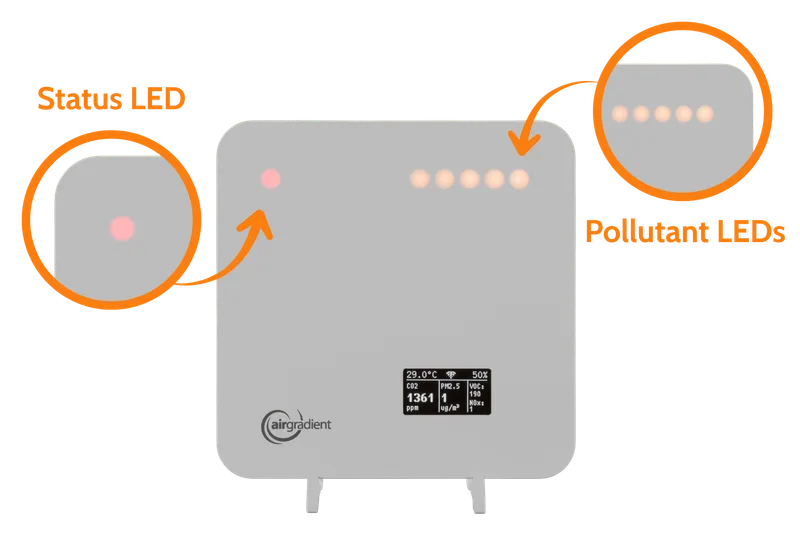
Top-left LED: This is a single LED in the device’s top-left corner. It is typically off but will turn on when the monitor encounters an issue.
LED bar (beginning in the top-right corner): This bar of nine LEDs starts at the top-right corner of the device and moves left. The more LEDs that turn on, the worse the air quality is.
It’s worth noting that despite the device having 11 LEDs, only 10 will turn on at any given time (up to nine for pollutant concentration and one separate LED for monitor status). However, most of the time, you will only see a few LEDs on the device.
Let’s discuss how you can interpret the LEDs across the top of your AirGradient ONE.
Pollutant LEDs
These are the LEDs that start at the top-right corner of the device and spread to the left as the air quality deteriorates.
- CO2
By default, these LEDs show CO2 concentration in accordance with the key in the image below.
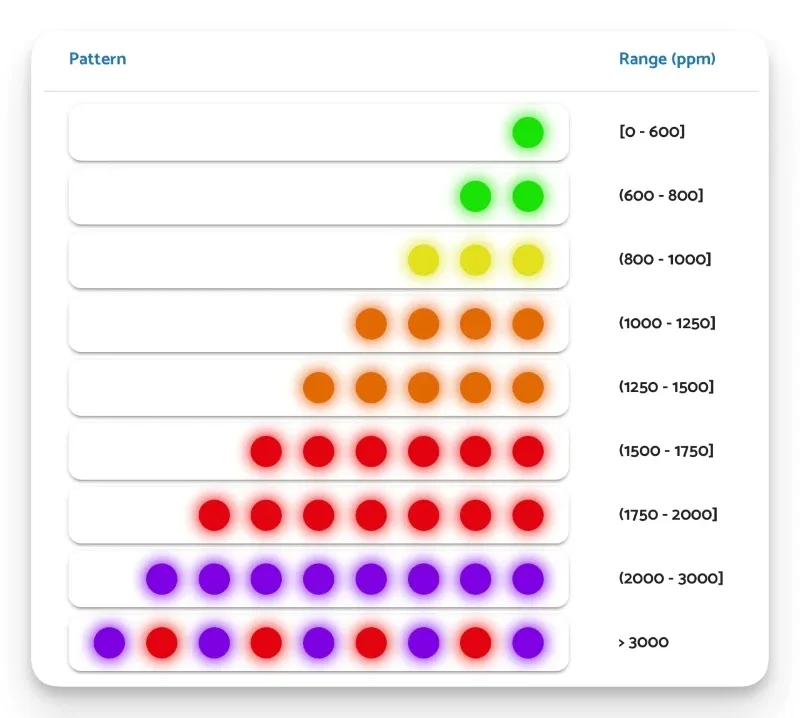
As you can see, when the air quality is good, you should expect to see only one or two LEDs at the top-right of the device. These will both be green. As the air quality worsens, the LEDs will spread further left and they will change to yellow, followed by orange, red and purple to indicate bad air quality
- PM2.5
Under the device settings on your dashboard, you can also change the LEDs to instead show PM2.5 concentrations.
See more details here: Control the LEDs and Display on the AirGradient ONE
It follows the same system, and you can find the full key in the image below.
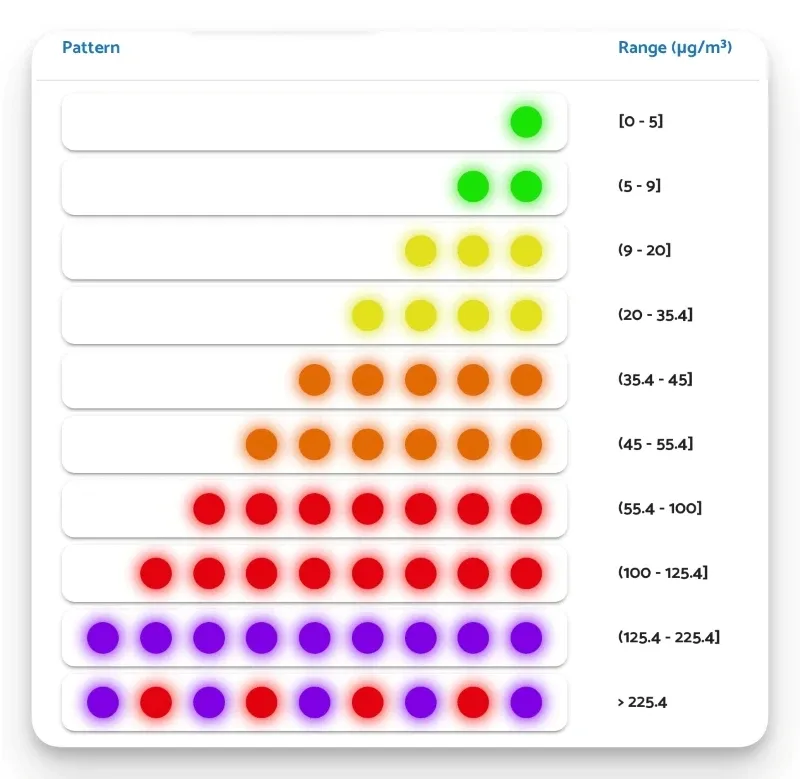
Currently, these LEDs can only be set to show either PM2.5 or CO2 concentration.
Status LEDs
While the single LED in the top-left corner should remain off most of the time, you may sometimes see it turn either red, yellow, or purple. These LEDs do not have any correlation to the air quality, and instead indicate monitor errors.
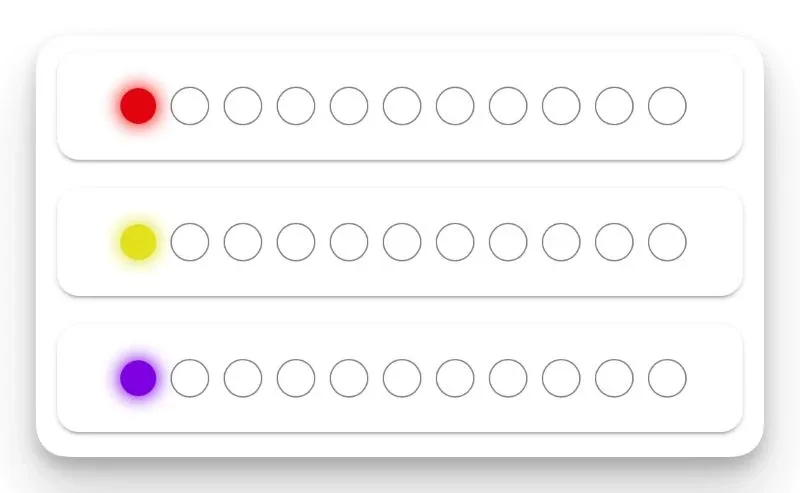
Red: Connection to WI-FI network failed. This may be due to incorrect credentials or unsupported encryption.
Yellow: Connected to WI-FI network but the server can not be reached through the Internet, e.g. blocked by firewall.
Purple: Server is reachable but there is some configuration issue to be fixed on the server side.
If the LED turns purple, it is likely an issue on our side and there is nothing you need to do. Connection will be restored as soon as our developers have had time to identify and fix the issue. If the LED is either red or yellow, you may need to change your Wi-Fi settings or connect to a different network.
LED Test
When the device is first booted, or as requested through Home Assistant or the web dashboard, an LED test can be performed. This test will light all of the LEDs so the user can ensure they are working. This is the only time (with normal firmware) that all eleven LEDs will turn on.