Connecting Your Monitor to the Dashboard
When connecting your monitor to the internet and dashboard for the first time, we recommend following our onboarding guide which can be found here. This document covers much of the same information, and is intended to help you troubleshoot if you run into issues with online onboarding.
This document outlines the steps to connect your AirGradient Open Air monitor to the AirGradient Dashboard. This process is essential for viewing, analyzing, and managing the data collected by your monitor. It assumes that your monitor is already successfully connected to the internet, either through WiFi or cellular.
This guide assumes you have already completed the steps in Chapter S3.1: Connecting Your Monitor to the Internet (Cellular Model) or S3.2: Connecting Your Monitor to the Internet (WiFi Model).
Monitor Differences
Although the O-1PST, O-1PST-CE and O-M-1PPSTON-CE (Open Air Max) connect to the internet in different ways, they all connect to the dashboard in a similar manner.
1. Connecting Your Monitor to the Dashboard
After successfully connecting your AirGradient Open Air monitor to the internet, either through WiFi or cellular, the next step is to add it to your AirGradient Dashboard. The dashboard provides a centralized platform for viewing, analyzing, and managing the data collected by your monitor.
- Connection via Onboarding Wizard
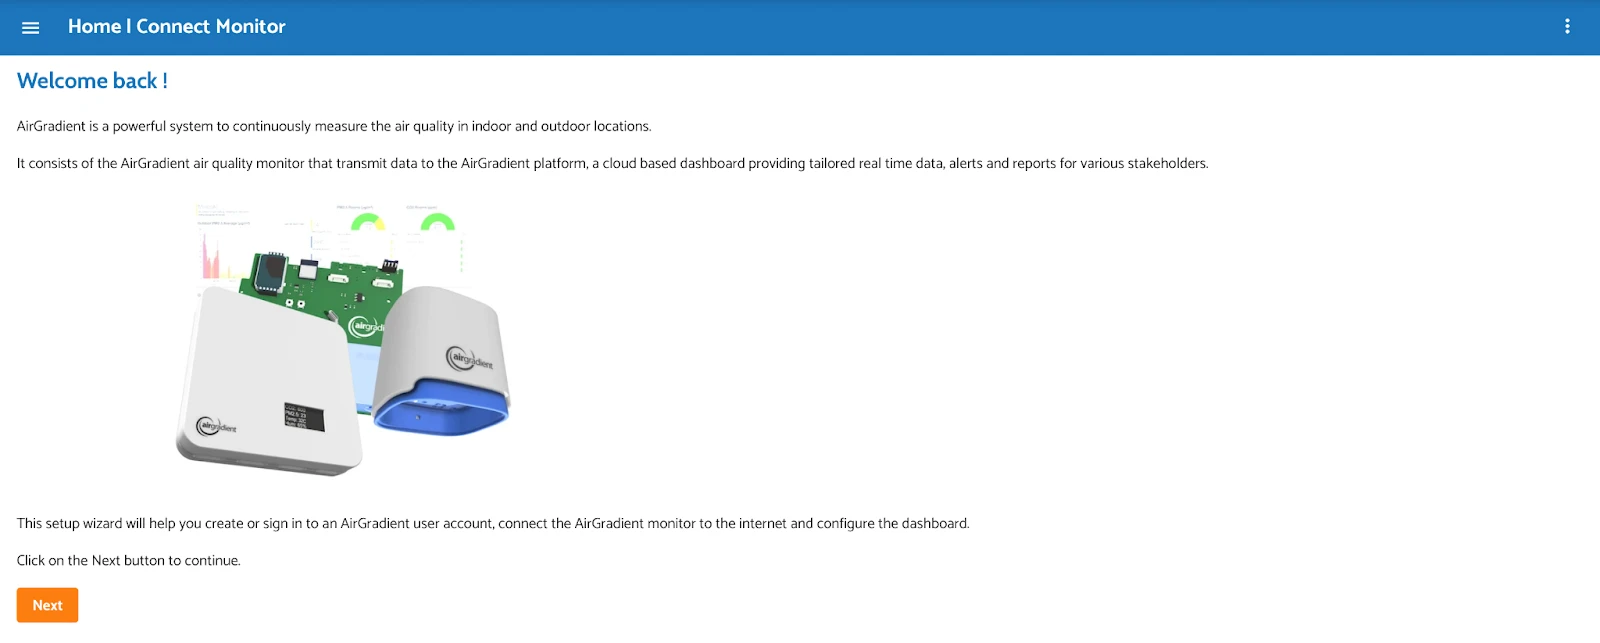
- The easiest way to add your monitor to the dashboard is through the AirGradient Onboarding Wizard. This wizard offers a step-by-step guide to streamline the process and ensure seamless integration.
- Before you begin, confirm that your monitor is powered on and connected to the internet, either through WiFi or cellular, as described in the previous documents. Once connectivity is established, you can proceed with the onboarding process.
- Navigate to the Onboarding Wizard
- To access the Onboarding Wizard, you can either click on this direct link: [Onboarding Wizard] or manually
enter the following URL in your web
browser: https://app.airgradient.com/onboarding/welcome
- To access the Onboarding Wizard, you can either click on this direct link: [Onboarding Wizard] or manually
enter the following URL in your web
browser: https://app.airgradient.com/onboarding/welcome
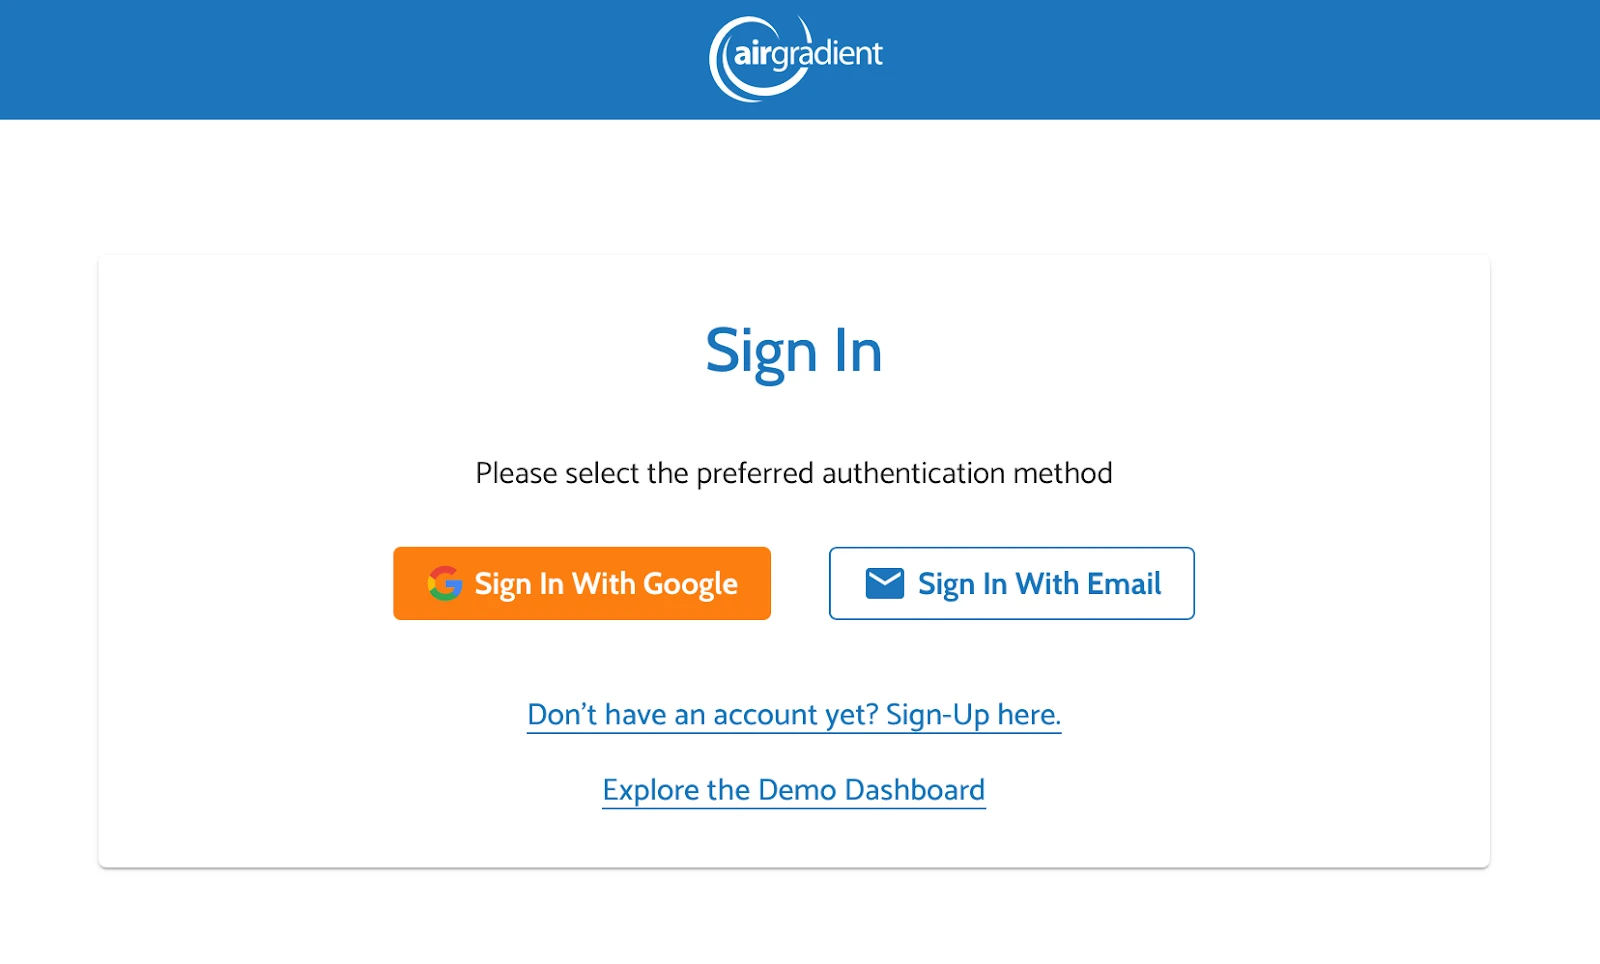
- Create or Sign In to an Account
- Upon accessing the Onboarding Wizard, click “Next” to proceed. You will then be prompted to either sign in to an existing AirGradient Dashboard account or create a new one. If you already have an account, simply sign in using your credentials, and the new monitor will be added to your existing account.
- If you do not have an account, you can create one using either a Gmail sign-in or another email address. During the account creation process, you will be asked to agree to the AirGradient Terms and Conditions and Privacy Policy.
- Once your account is created, you will be automatically redirected to the setup wizard. If, for any reason,
you are not automatically redirected, you can manually navigate to the setup wizard using this
link: https://app.airgradient.com/onboarding/setup/sensors
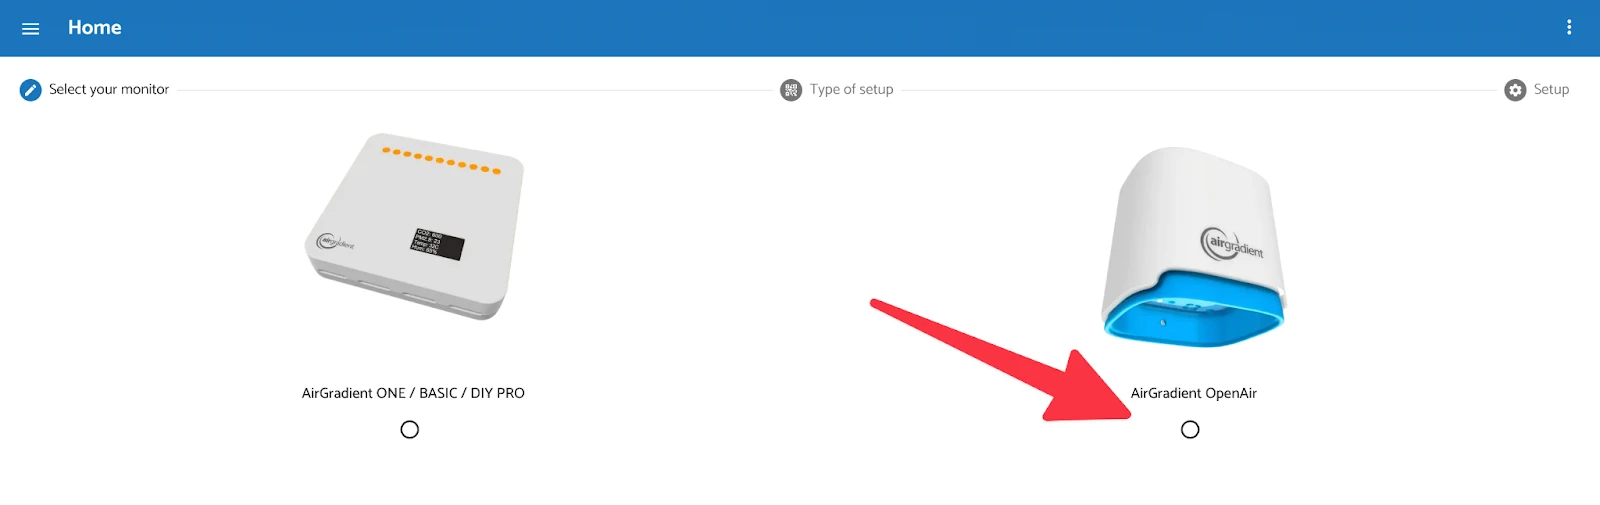
- Select “AirGradient Open Air OR Open Air Max”
- You will be prompted to select the monitor you are setting up. In this case, you should select either the Open Air
or Open Air Max depending on which monitor you are setting up.
- You will be prompted to select the monitor you are setting up. In this case, you should select either the Open Air
or Open Air Max depending on which monitor you are setting up.
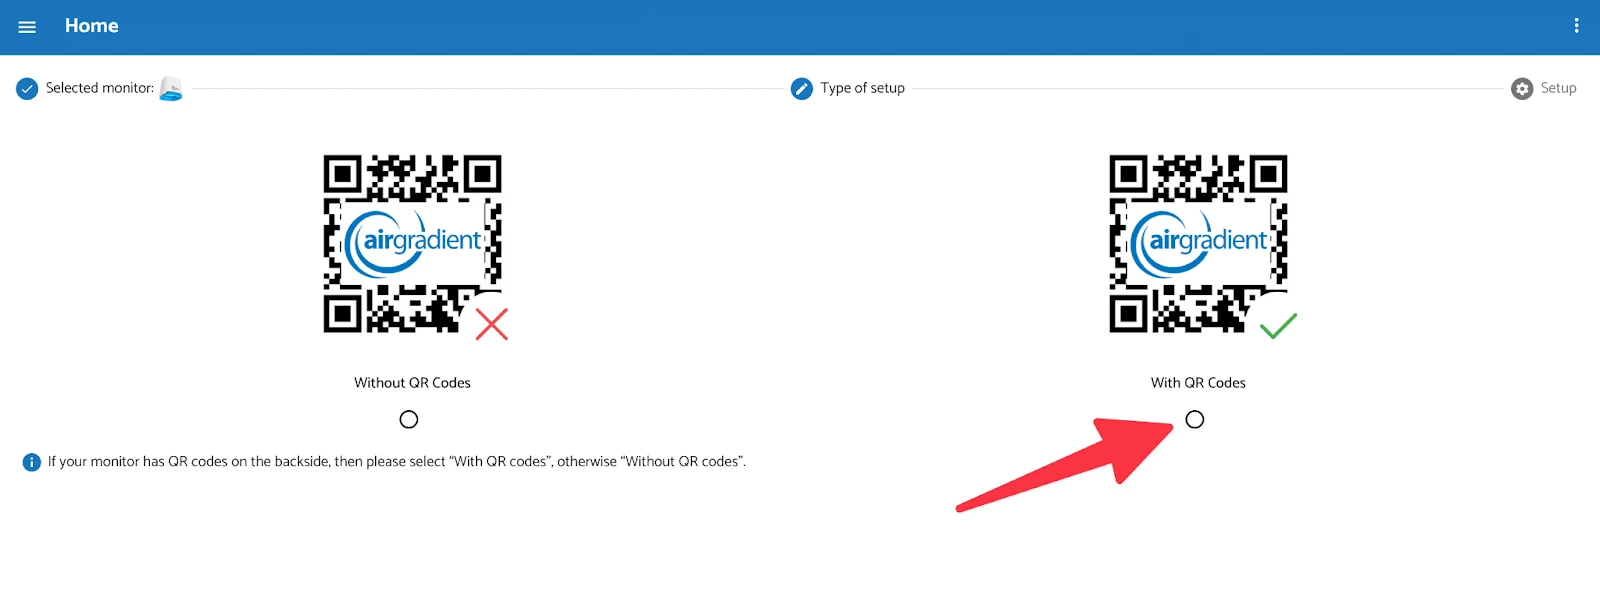
- Select “With QR Codes”
- In the setup wizard, you will be prompted to select whether your monitor has a QR code. All fully assembled
AirGradient Open Air monitors come with QR codes. Therefore, select the option “With QR Codes” to proceed.
- In the setup wizard, you will be prompted to select whether your monitor has a QR code. All fully assembled
AirGradient Open Air monitors come with QR codes. Therefore, select the option “With QR Codes” to proceed.
- Scan the QR Code
- Locate the QR code labeled “To Dashboard” on the back of your monitor. Using your smartphone or tablet, scan this QR code.
- Login to AirGradient (if needed)
- If you are not already logged in to your AirGradient account on the device you are using to scan the QR code, you will be redirected to the login page. Enter your login credentials to proceed.
- Access “Add New Monitor” Page
- After successfully logging in, you will be redirected to the “Add New Monitor” page.
- After successfully logging in, you will be redirected to the “Add New Monitor” page.
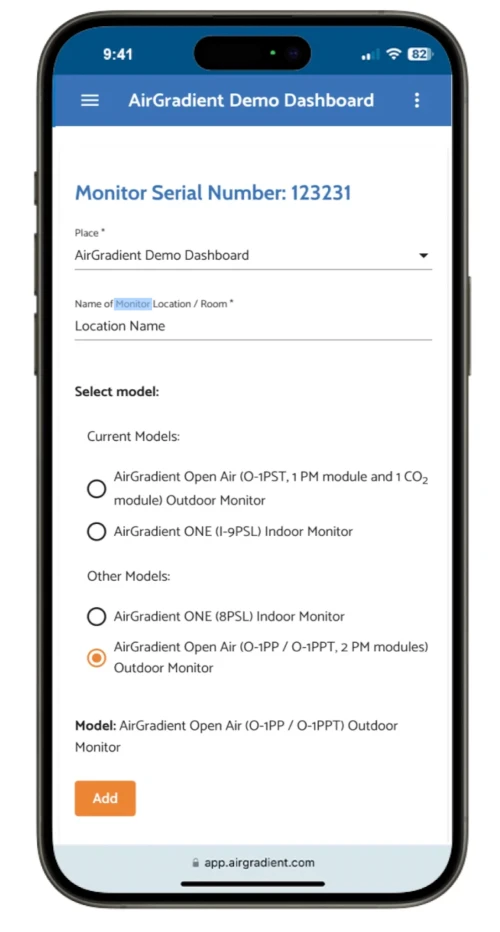
- Name Your Monitor
- On the “Add New Monitor” page, you will be asked to assign a name to your monitor. It is recommended to choose a name that reflects the monitor’s location, such as the room or area where it is installed. This name will be visible to all users who have access to the dashboard, so choose a clear and descriptive name.
- Select the Monitor Model
- Finally, select the correct model of your AirGradient Open Air monitor. Choose from the options: O-1PST, O-1PST-CE, or O-M-1PPSTON-CE, depending on the specific model you have.
Once you have completed these steps, your AirGradient Open Air monitor will be successfully added to your dashboard. You should start seeing data from the monitor appearing on the dashboard within a few minutes.
2. Confirming Your Monitor Works
After following the setup procedures and successfully adding your AirGradient Open Air monitor to your dashboard, it’s time to confirm that everything is functioning as expected. This final verification step ensures that your monitor is correctly collecting and transmitting data to the dashboard for analysis and visualization.
To confirm the monitor’s operation, begin by ensuring that the monitor is properly connected to a power source. The LED indicator light on the monitor should be stable, indicating a continuous power supply. If the LED is flashing, it suggests that the monitor is still attempting to connect to the internet or is experiencing connectivity issues. In this case, you may need to revisit the previous troubleshooting steps or contact our support team for assistance.
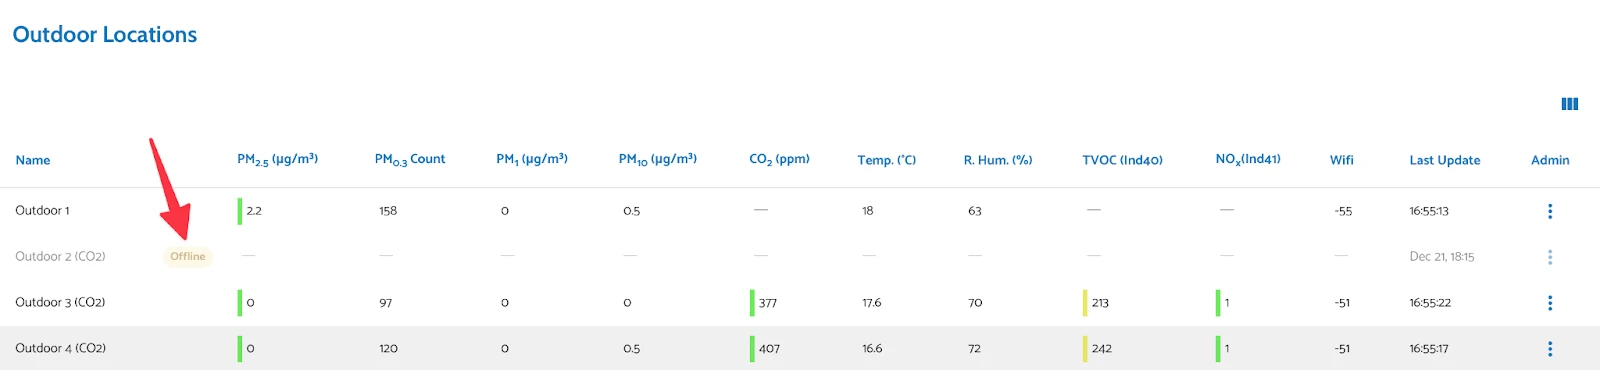
Once you have verified the power connection, navigate to your AirGradient dashboard. If the monitor is successfully transmitting data, you should observe readings appearing on the dashboard within a few minutes. These readings will include various air quality parameters, such as PM2.5, CO2, temperature, and humidity, depending on the specific model of your monitor.
If you encounter any difficulties or do not see data appearing on the dashboard, it is recommended to double-check the following:
- Power Connection: Ensure the monitor is securely connected to a power source and the LED light is stable.
- Internet Connection: Verify that the monitor has a stable internet connection, either through WiFi or cellular, depending on the model.
- Dashboard Connection: Confirm that the monitor has been correctly added to your AirGradient dashboard account.
If you have verified these aspects and are still experiencing issues, please reach out to our support team (https://www.airgradient.com/support/) for further assistance.
With your AirGradient Open Air monitor now confirmed to be working correctly, you can begin monitoring your indoor air quality and gain valuable insights into the health of your environment.
3. Frequently Asked Questions (FAQs)
Please refer to some of the commonly asked questions below if you encounter any issues when connecting your monitors to the internet and dashboard.
How do I access the AirGradient dashboard?
Visit the Onboarding Wizard and log in or create an account to register your monitor.
What information do I need to create an account?
You need an email address (or Gmail account) and must agree to AirGradient’s Terms and Privacy Policy.
The QR Code to add the monitor to the Dashboard does not work. What now?
Go back to the AirGradient Dashboard setup wizard
(https://app.airgradient.com/onboarding/setup/sensors) and select the option to add a monitor without a QR code.
Follow the on-screen instructions, providing the monitor’s serial number when prompted.
Developed by AirGradient in Collaboration with the UNDP Global Centre Singapore CC-BY-SA