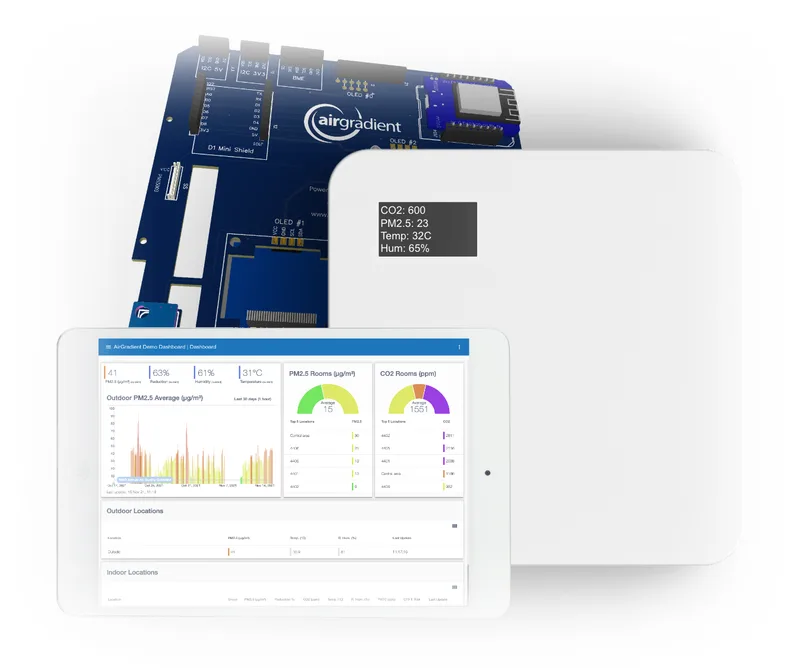
The AirGradient DIY Air Quality Sensor (Pro Presoldered-Version, PCB Version < 3.7)
The AirGradient DIY Air Quality Sensor (Pro Presoldered-Version, PCB Version < 3.7)
Introduction
These build instructions cover the pre-soldered version of the AirGradient Pro monitor kit for PCB version 3.6 and lower. If you have a different version please find your correct build instructions in this overview: https://www.airgradient.com/documentation/kb/kb-diy-the-airgradient-builds-overview. The version number is printed on the PCB.
The build instructions of the version that require soldering can be found here.
The AirGradient Pro DIY monitor measures PM2.5, CO2, Temperature and humidity. These measures can be shown on the display and sent to a server (e.g. the AirGradient platform or any other cloud backend) for data logging.
You can purchase the kit with all components from our Online Store and be sure that everything fits. We ship world-wide.
Skills And Equipment Required
For this project you should be familiar with the following:
| Skill | Description |
|---|---|
| Computer | A Linux, Mac, or Windows computer with the Arduino IDE installed to flash the software onto the D1 Mini. You can also flash the software directly from the browser. |
| Screwdrivers | You need Philips and hex (M6) Screwdrivers to close the enclosure. |
Components
Below is the list of components that you will receive with the pre-soldered kit:
| Component | Approx. Price |
|---|---|
| AirGradient Pro PCB | with OLED Display, connectors and pin sockets |
| D1 Mini v4 USB-C | with pre-soldered pins |
| Plantower PMS5003 PM Sensor | with cable |
| Senseair S8 CO2 Sensor | with pre-soldered pins |
| SHT31 Temperature and Humidity Sensor Module | with pre-soldered pins |
| USB-C Cable | 90-degree head |
| Enclosure | UV-resistant injection molded ASA plastic |
| Screws | The longest screws are for the enclosure. The screws with the washer head are for the PCB and the remaining screws for the PMS sensor. |
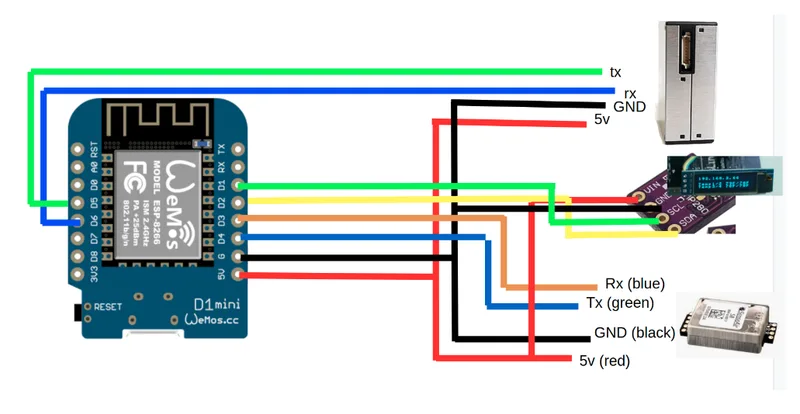
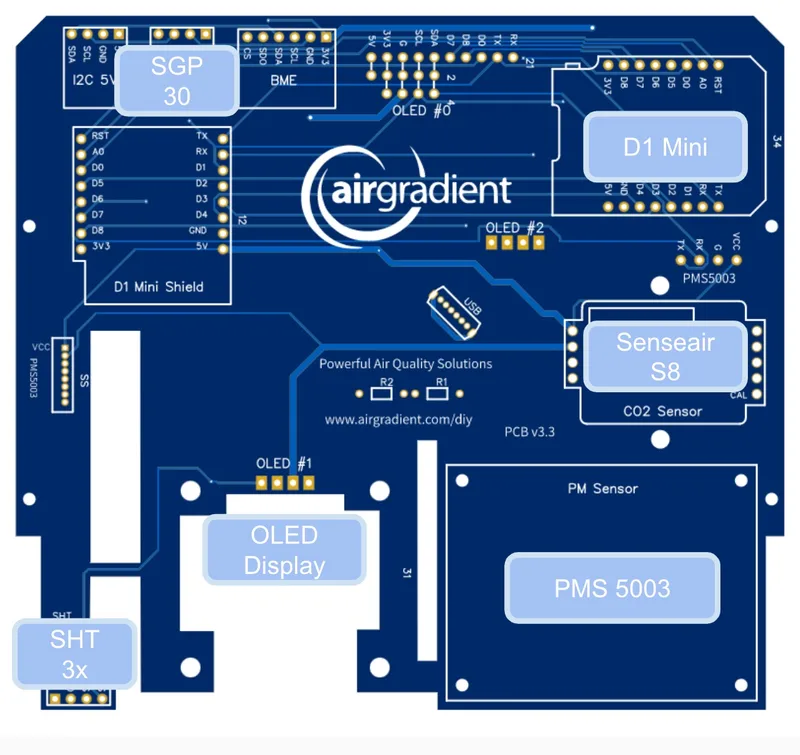
Schematics
Assembly
The assembly of the pre-soldered parts is very simple, just make sure you mount the components in the correct direction. The labels on the components should match the labels on the PCB.
We recommend you start in the following order:
D1 Mini
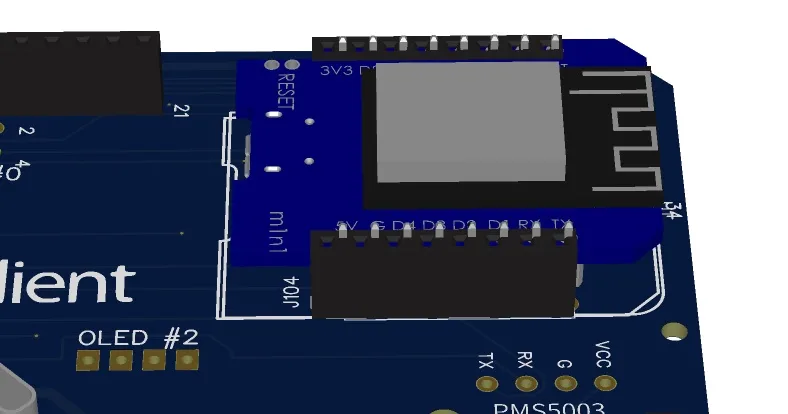
Put the D1 microcontroller onto the pin sockets labelled "Microcontroller". Make sure that the orientation is correct and all pins slide into the sockets.
SHT31 Module (Temperature and Humidity)
Put the SHT31 Module onto the pin sockets labelled "SHT". Make sure that the orientation is correct and all pins slide into the sockets.
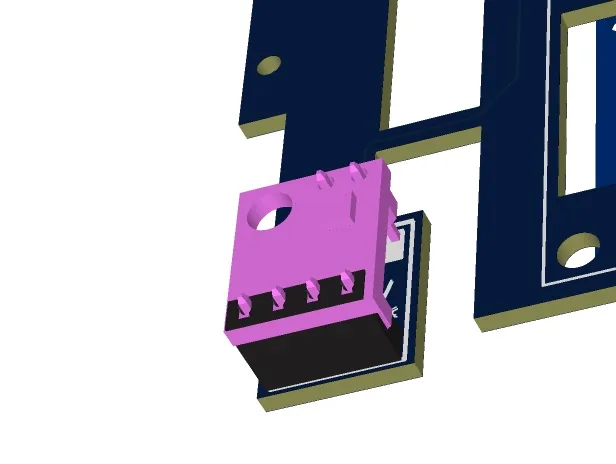
Senseair S8 Module (CO2 Sensor)
Put the CO2 Module onto the pin sockets labelled "CO2 Sensor". Make sure that the orientation is correct and all pins slide into the sockets.
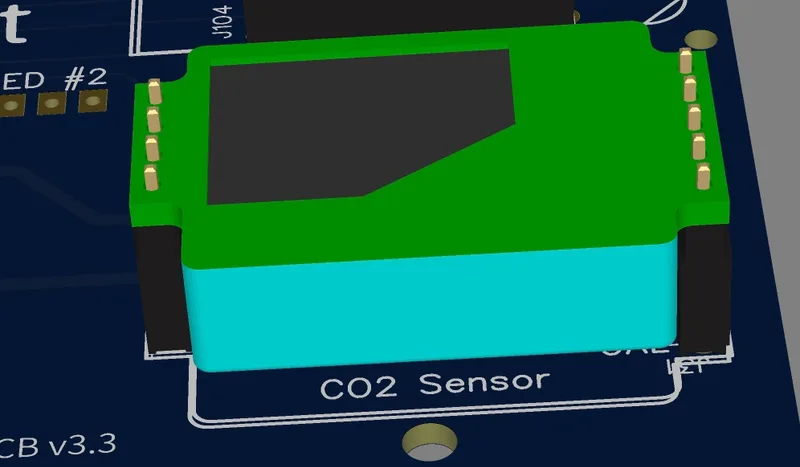
Important: Compared to the smaller DIY Basic kit, the pins here are soldered the opposite way to enhance the accuracy and airflow around the sensor. So in case you have a DIY Basic kit you cannot swap the sensor modules without resoldering the pins to change their orientation.
PMS5003 (PMS Sensor)
The PMS Sensor is connected with the enclosed cable to the PCBs JST connector.
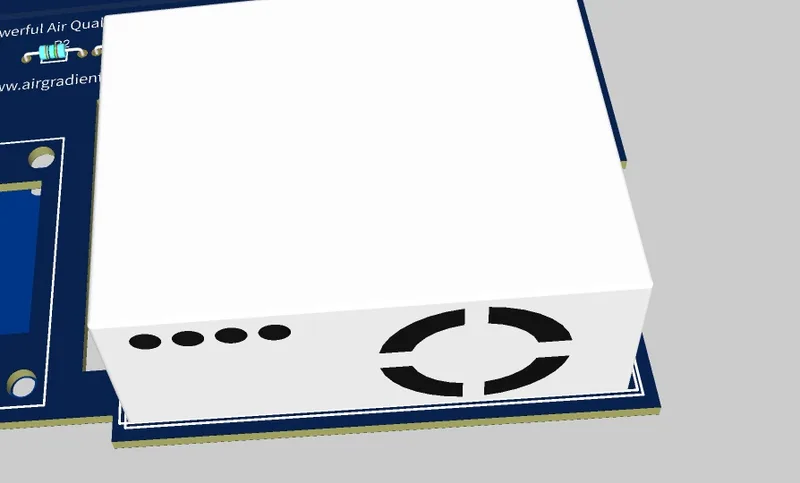
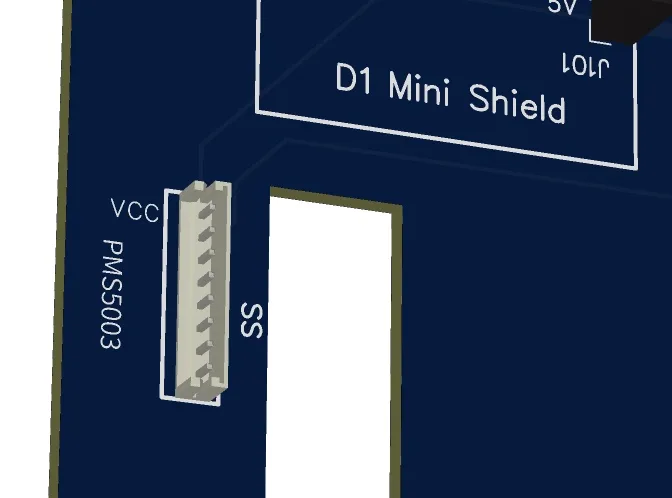
Then screw the PMS5003 onto the PCB.
Testing And Putting It Into The Enclosure
Now you can power on the device and you should be able to see the display lighting up. If you flashed the Wi-Fi version, you need to connect it to the Wi-Fi. To do this open you Wi-Fi settings on the phone and look for a hot spot called "AirGradient______". Then connect to it and enter your Wi-Fi network credentials. It will then connect to Wi-Fi and start displaying and sending the air quality data.
In case you have any issue, check this guide or get help from the Open AirGradient Forum.
If everything works, you can screw the PCB into the top cover of the enclosure and close the enclosure.
Direct Flashing Through The Browser
The pre-soldered version of the kit comes with the microcontroller D1 already flashed so that you can immediately use it. However, you might want to flash it again or change the code (e.g. to connect it to a different server). Also, the pre-soldered kit comes flashed by default with Celcius for the temperature unit and if you would like to use Fahrenheit you would need to reflash with below.
You can either manually flash the code through the Arduino software or use the more simple buttons below.
Connect the D1 Mini to your computer through a data-capable cable and press the button below. Make sure you use the Chrome or Edge browsers on your computer for this to work.
Note that you cannot flash through the USB-C port on the PCB as this one is only for power. For flashing always use the USB port on the D1 Mini itself.
| For Standard PRO Presoldered Kit | |
|---|---|
| With temperature in Celcius and Display top-left |
|
| With temperature in Fahrenheit and Display top-left |
|
| With Code for Optional SGP4x AirGradient TVOC Module | |
|---|---|
| With temperature in Celcius and Display top-left |
|
| With temperature in Fahrenheit and Display top-left |
|
Once the code is flashed, it will open a hotspot for 60 seconds to which you can connect and then set your Wi-Fi credentials. By default it will connect to the AirGradient Dashboard. If you want to use another endpoint you can change the code with the manual flashing method below.
If you do not connect it to Wi-Fi within the 60 seconds after startup it will go into the offline mode and show the air quality parameters without sending the data.
Manual Flashing with the Arduino Software
The above direct flashing is the easiest way to get the firmware onto the D1 Mini but if you want to make changes to the code, you can also flash the code through the Arduino software environment. All software for the AirGradient DIY sensor is open source and thus you can make any changes you’d like.
Please read the following blog post on how to install the Arduino software, set up the D1 Mini board and the AirGradient Arduino library.
AirGradient Arduino Software Setup Instructions
Flashing Of The AirGradient Firmware
Once you have the Arduino Software setup for the D1 Mini, you can flash it with the AirGradient firmware.
| Step | Description |
|---|---|
| 1 | Go to Tools, Manage Libraries, and then search for AirGradient and install the AirGradient library. |
| 2 | Once it is installed, go to File, Example, AirGradient and select the PM OLED code |
| 3 | Read the instructions on top of the example code and install the additional libraries |
| 4 | Then flash this code the same way you flashed the BLINK example |
Solutions For Schools
AirGradient offers a sophisticated, powerful and responsive Air Quality Monitoring Solution for Schools. You can connect these DIY monitors to the AirGradient platform, integrate with many existing brands or use our professional AirGradient ONE monitor.
If you are interested in a free trial of the solution for schools, please contact us.
AirGradient Dashboard
Our kits come with several months of free subscription to the AirGradient dashboard. To connect your monitor to the dashboard, please follow these instructions: https://www.airgradient.com/documentation/kb/register-open-air-dashboard.
MIT License
The AirGradient DIY sensor's hardware and software is open source and licensed under the MIT license. So feel free to use it any way you like. We would be happy to hear from you and also appreciate any link back to our page.
Copyright AirGradient Co. Ltd.
Permission is hereby granted, free of charge, to any person obtaining a copy of this software and associated documentation files (the "Software"), to deal in the Software without restriction, including without limitation the rights to use, copy, modify, merge, publish, distribute, sublicense, and/or sell copies of the Software, and to permit persons to whom the Software is furnished to do so, subject to the following conditions:
The above copyright notice and this permission notice shall be included in all copies or substantial portions of the Software.
THE SOFTWARE IS PROVIDED "AS IS", WITHOUT WARRANTY OF ANY KIND, EXPRESS OR IMPLIED, INCLUDING BUT NOT LIMITED TO THE WARRANTIES OF MERCHANTABILITY, FITNESS FOR A PARTICULAR PURPOSE AND NONINFRINGEMENT. IN NO EVENT SHALL THE AUTHORS OR COPYRIGHT HOLDERS BE LIABLE FOR ANY CLAIM, DAMAGES OR OTHER LIABILITY, WHETHER IN AN ACTION OF CONTRACT, TORT OR OTHERWISE, ARISING FROM, OUT OF OR IN CONNECTION WITH THE SOFTWARE OR THE USE OR OTHER DEALINGS IN THE SOFTWARE.