Registering Your AirGradient Open Air on the AirGradient Dashboard
Registering Your AirGradient Open Air on the AirGradient Dashboard
There are two ways to add your AirGradient Open Air to the dashboard.
You can:
Follow this guide and add the monitor to the dashboard first.
The order does not matter. However, the device will not send any data to the dashboard until both steps have been completed.
Add to dashboard using the QR code (pre-assembled units)
If you have a pre-assembled AirGradient Open Air, you can add it using the “Add to Dashboard” QR code printed on the back of the device.
1 - Scan the Add to Dashboard QR code
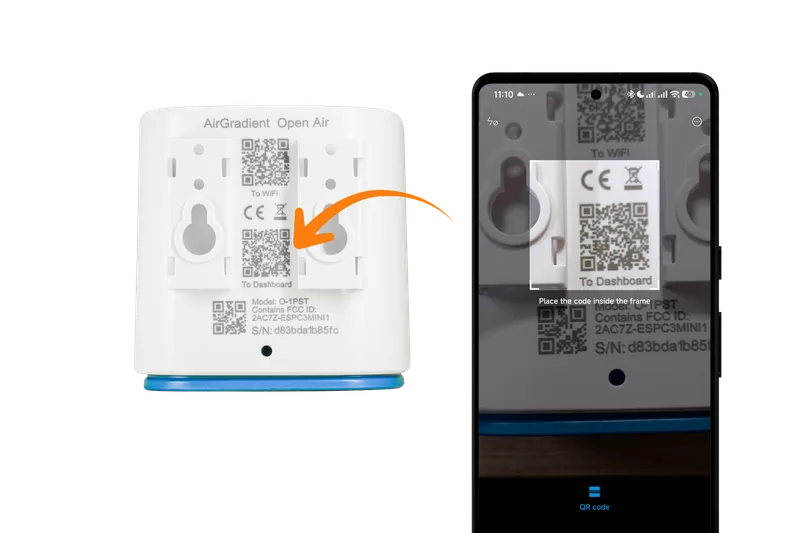
2 - You will be taken to the AirGradient Dashboard: https://app.airgradient.com/
Log in, or create an account if you don’t already have one
The monitor’s serial number will be pre-filled
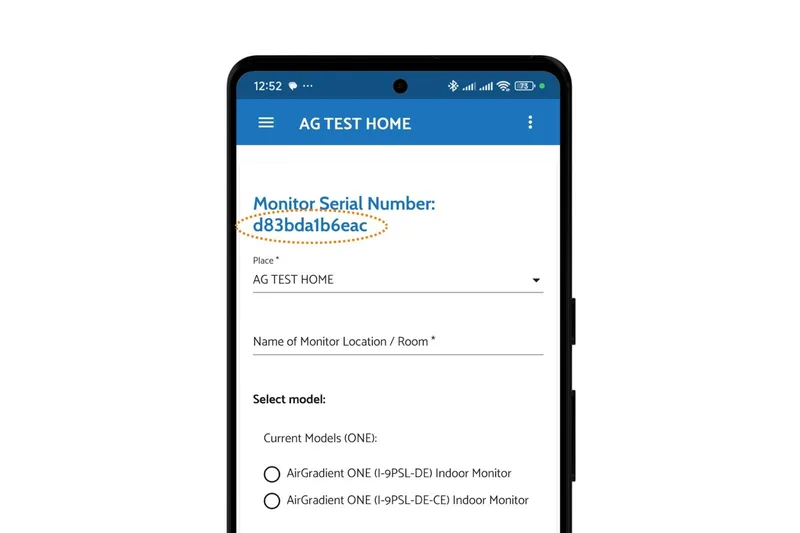
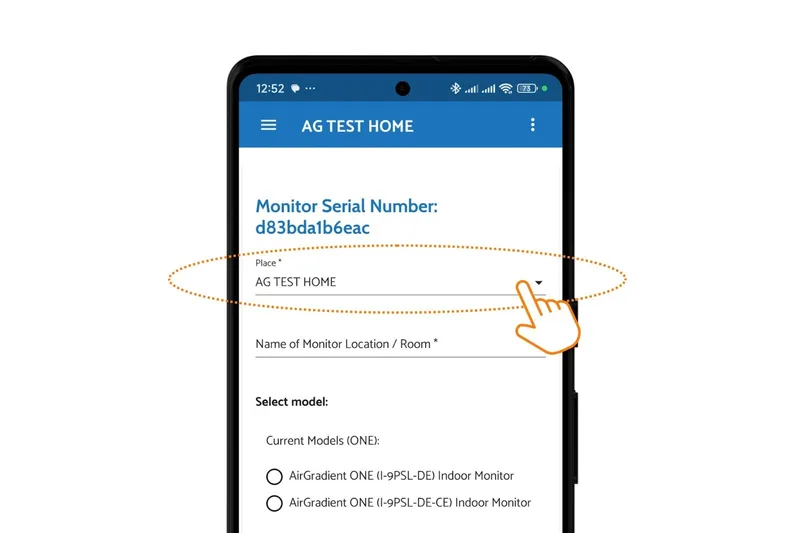
3 - Pick which dashboard (Place) you want to associate the monitor with (if you have multiple) or create a new Place:
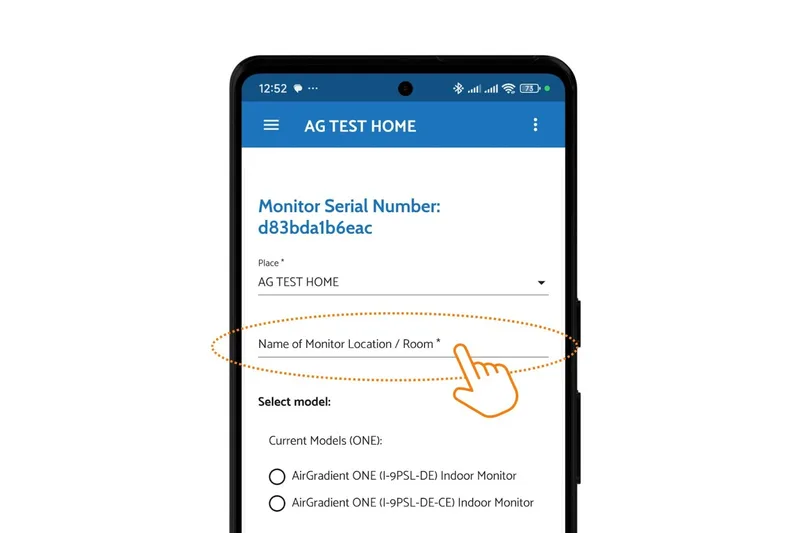
4 - Enter a location name for the monitor location
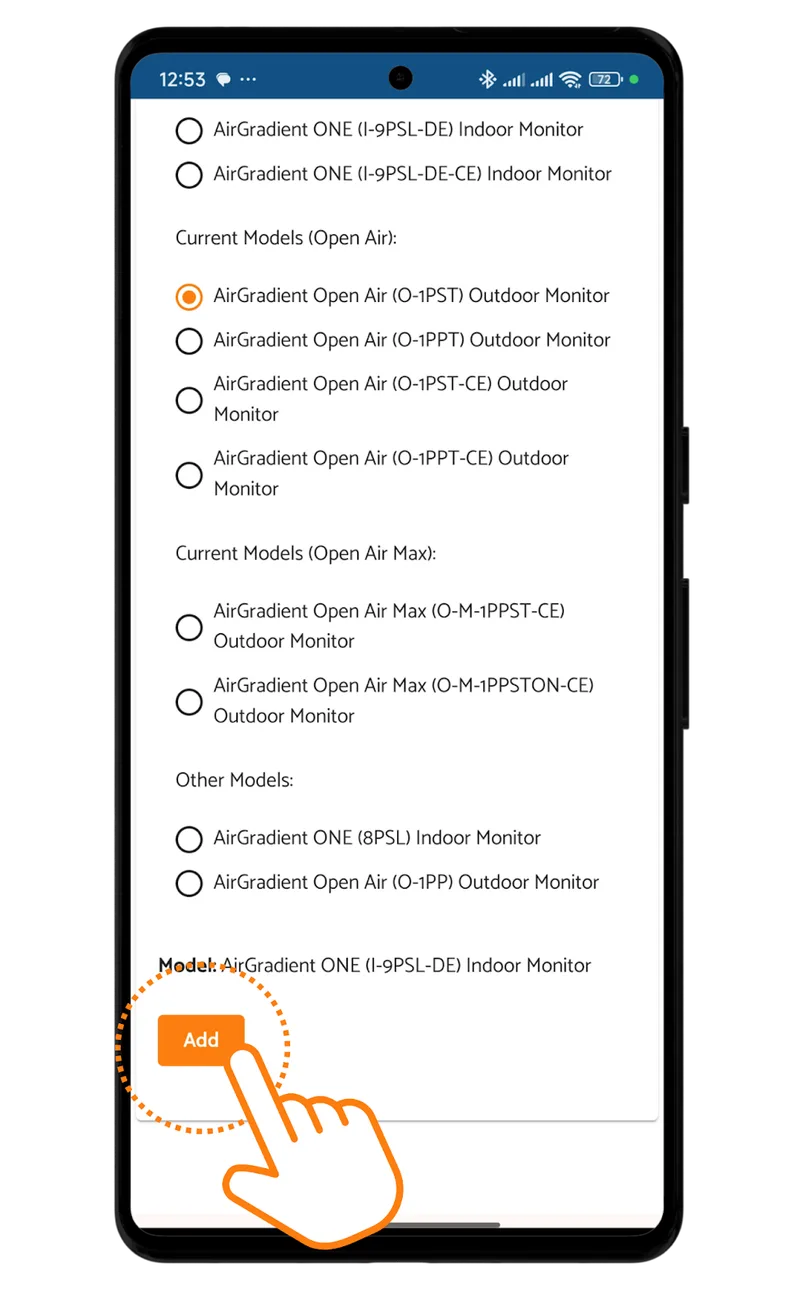
5 - Select the exact model number. For assembled monitors, this is printed on the back of the monitor:

- If you’re unsure, see: [AirGradient Models]
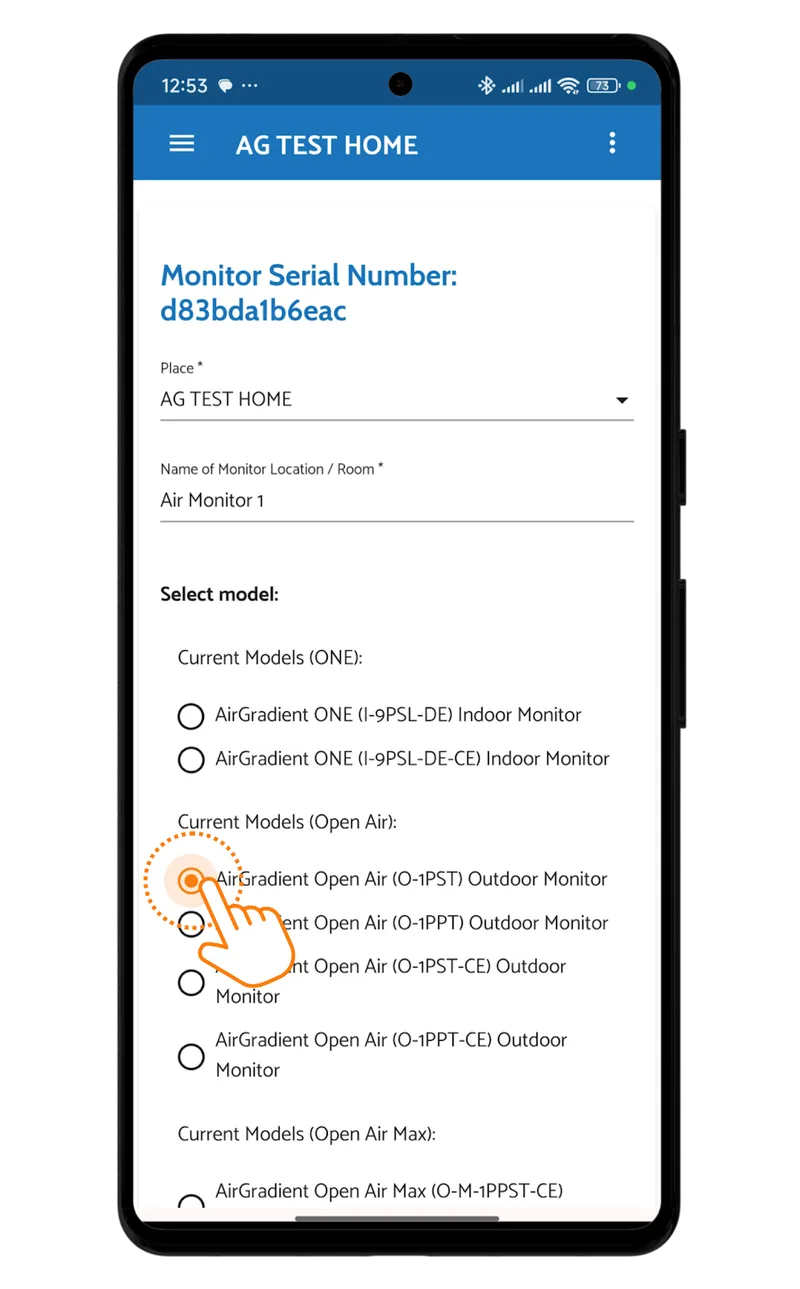
6 - Click Add
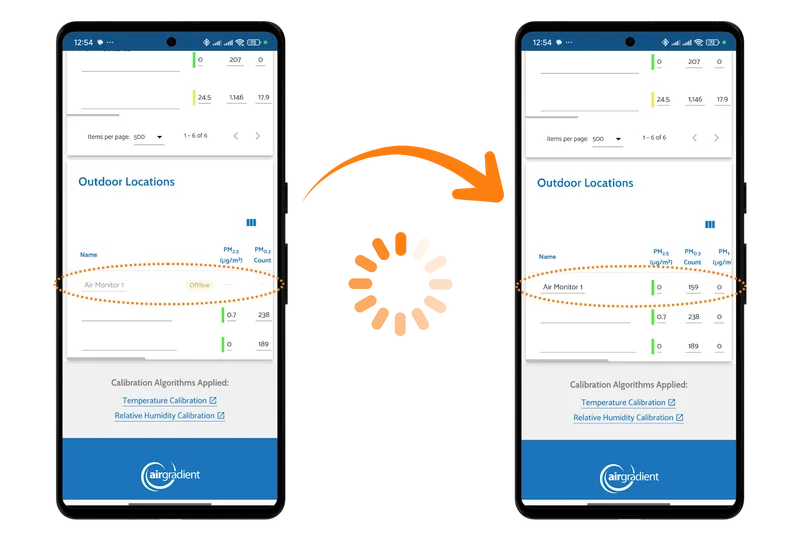
The monitor will now appear in your dashboard. You should see an entry for the monitor on your dashboard, but it will likely show as offline for the first minute or two. Please allow up to five minutes for the monitor to show as online and for the data to begin reporting.
Add to dashboard manually (DIY Kit or QR code not working)
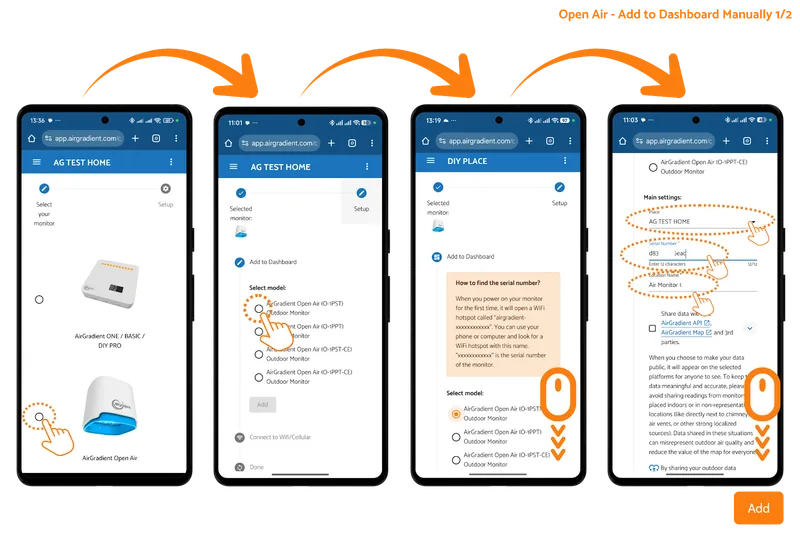
If you have a DIY kit, or if the QR code does not work, you can add the device manually:
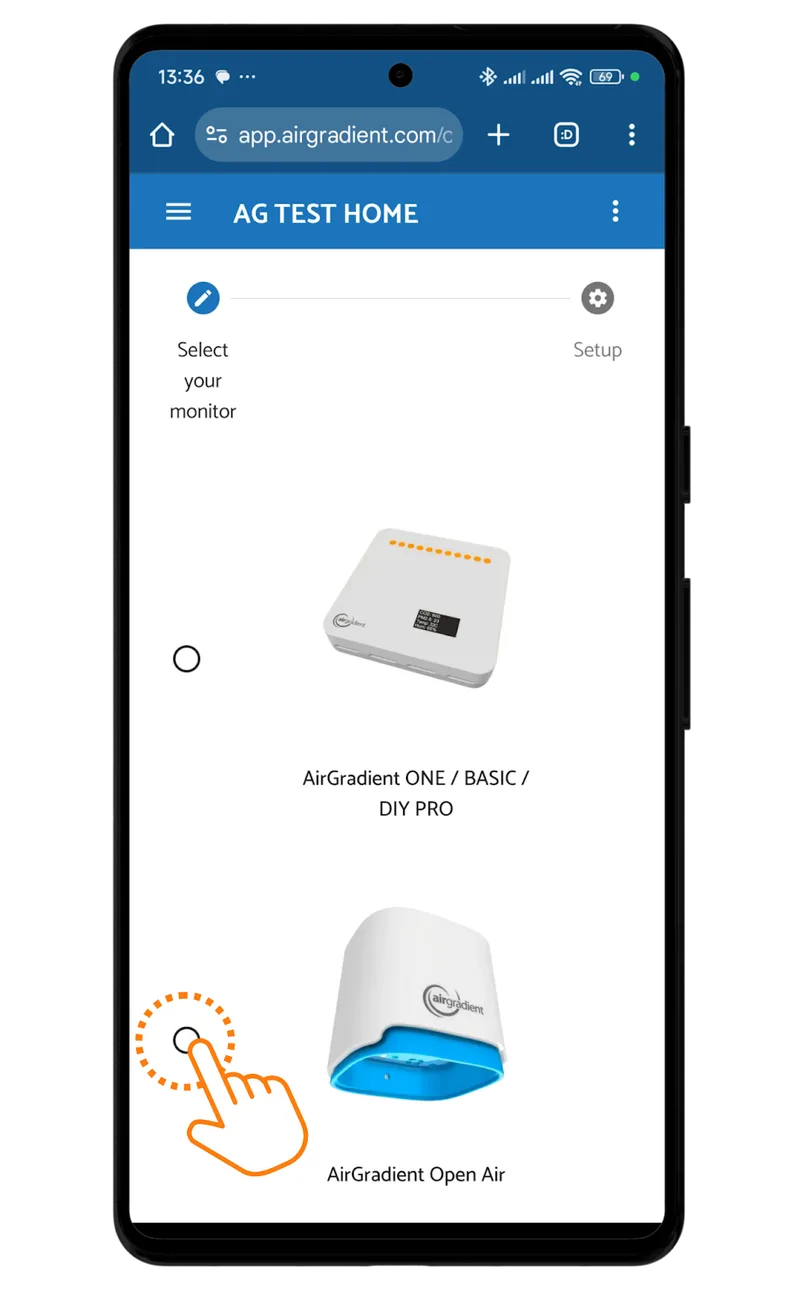
1 - Open the monitor onboarding guide.
2 - Select the monitor type that you are trying to connect to your dashboard. In this case, you need to select the AirGradient Open Air.
3 - Select the exact model number. For assembled monitors, this is printed on the back of the monitor but for DIY kits, it is not. For the AirGradient Open Air the latest model number is generally either:
O-1PST (Standard Wi-Fi Version)
O-1PST-CE (Cellular Version)
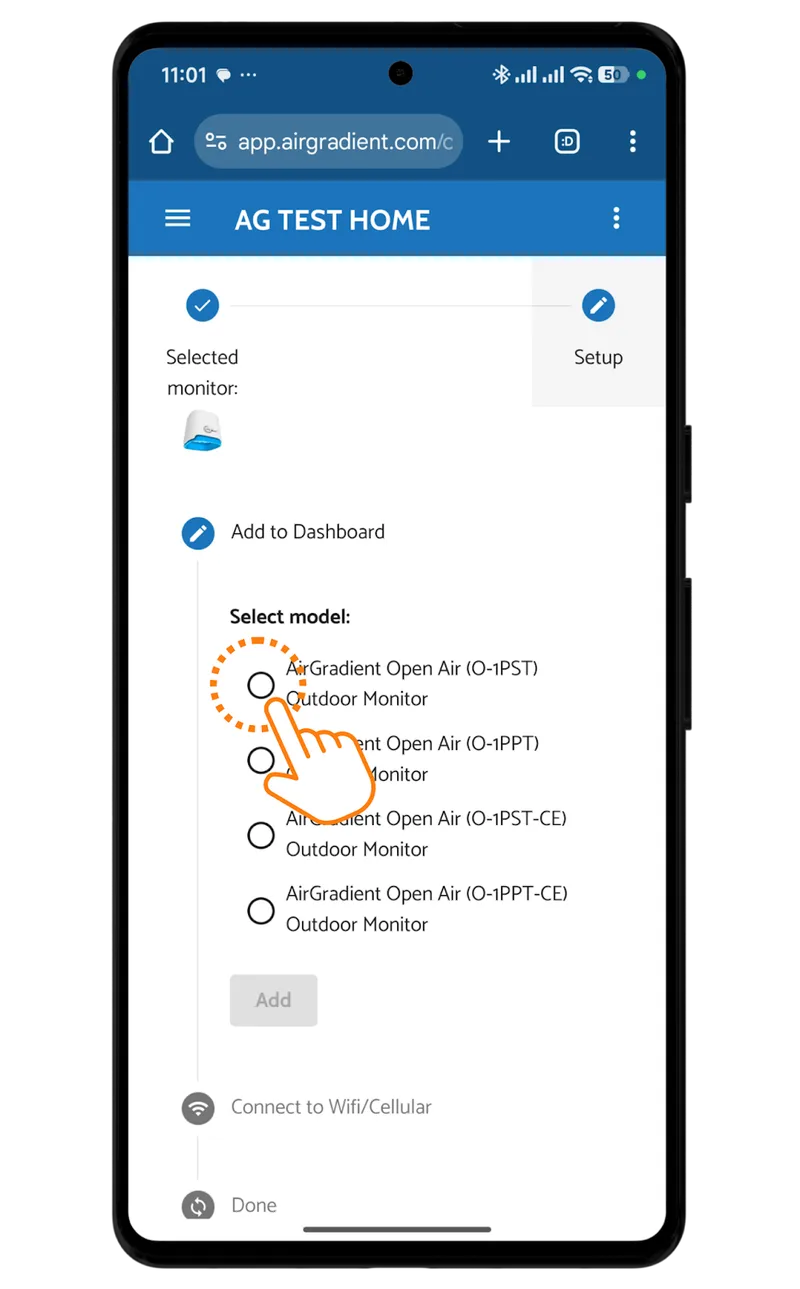
If you’re unsure, see: [AirGradient Models]
4 - Pick which dashboard (Place) you want to associate the monitor with (if you have multiple) or create a new Place
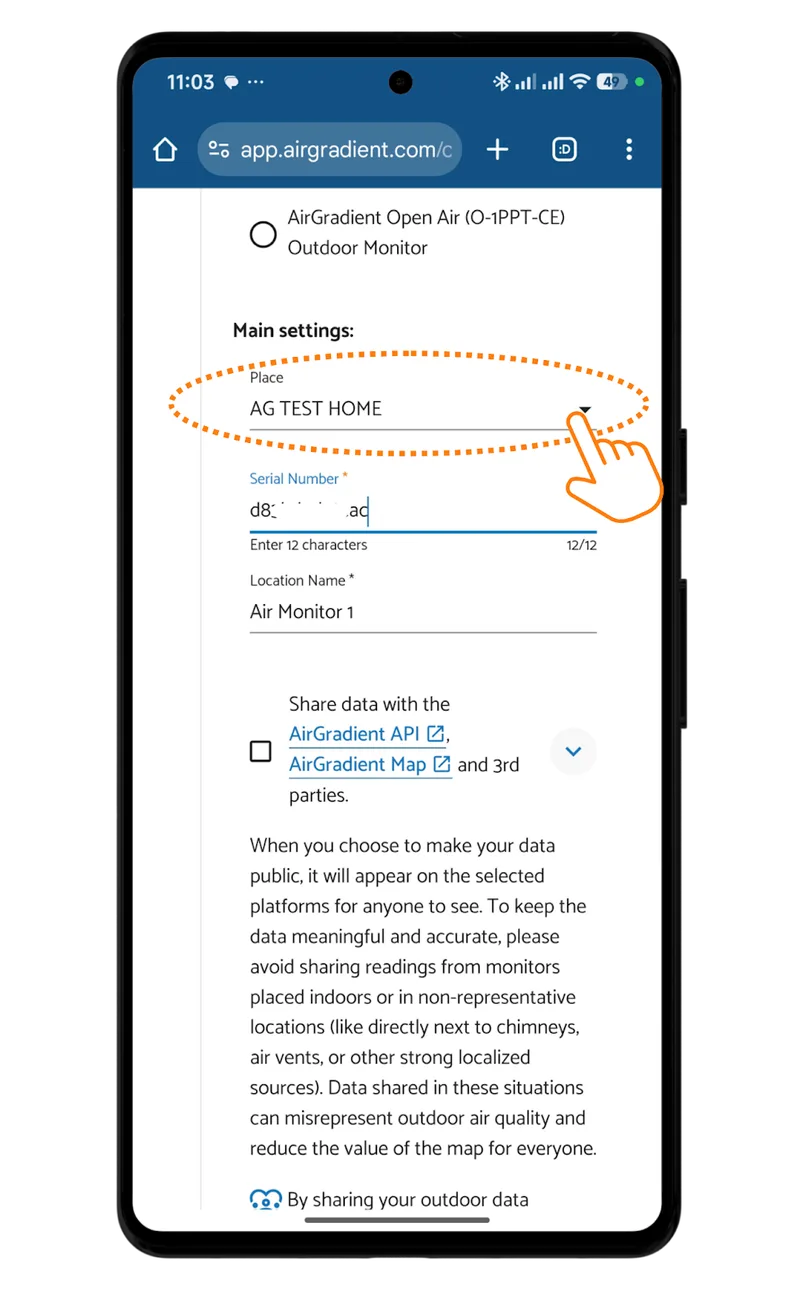
5 - Enter the serial number (SN) of the monitor.
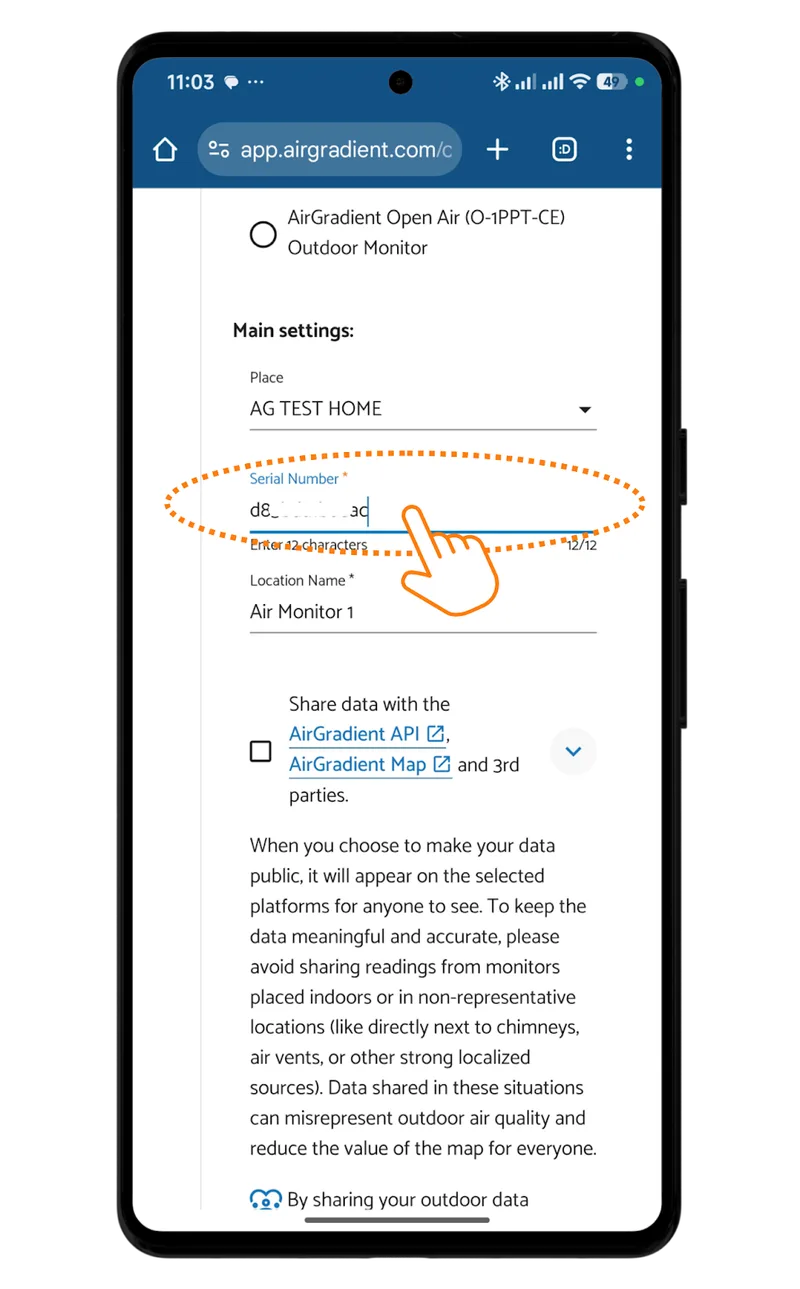
For assembled monitors, the SN printed on the back of the monitor but for DIY kits, it is not. To find the SN for the DIY kits, when you startup the monitor, you can see a message “180s to connect to WiFi Hotspot airgradient-xxxxx”. The xxxxx is the serial number of the monitor. Please make sure that you use it in lower case only and also do not use “airgradient-” which is not part of the serial number. So if for example, the display shows “airgradient-625bf2”, then “625bf2” is the serial number.
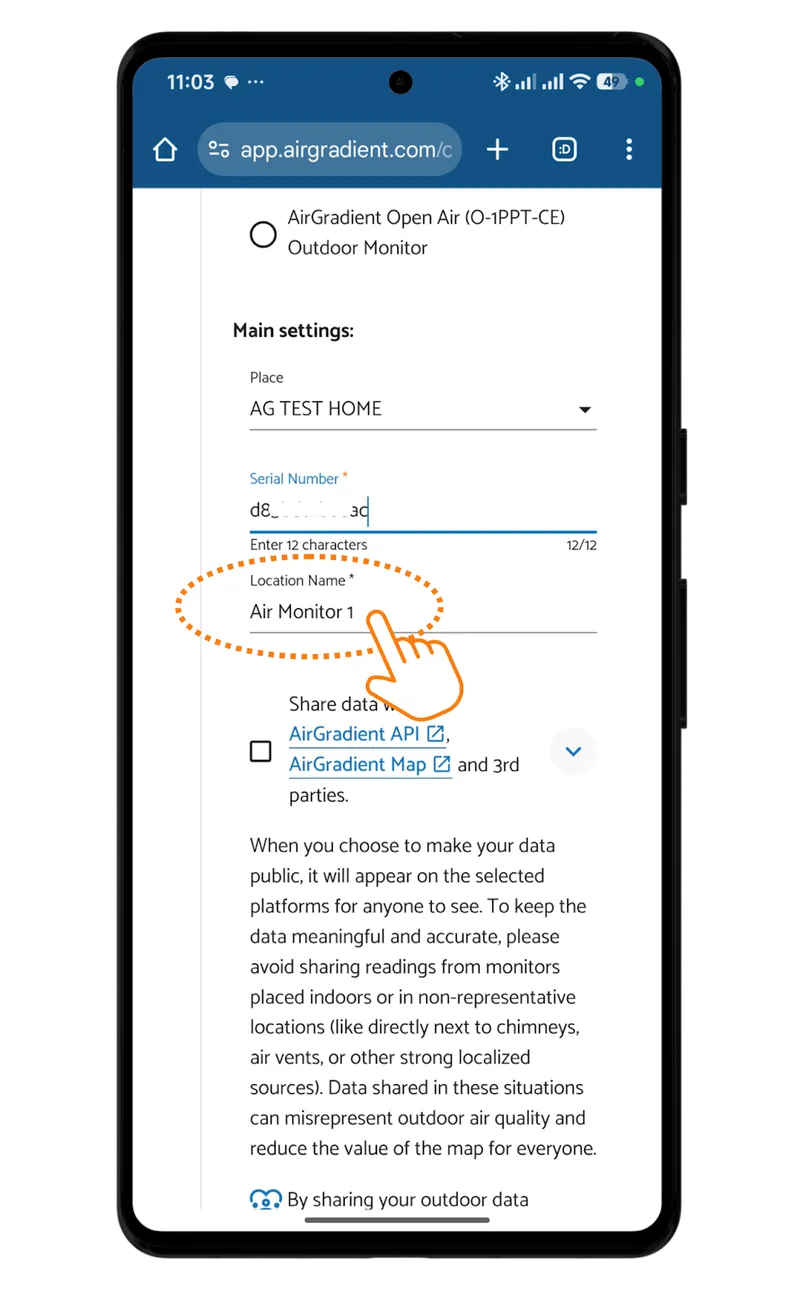
6 - Enter a location name for the monitor.
7 - Choose whether you want to share your data publicly:
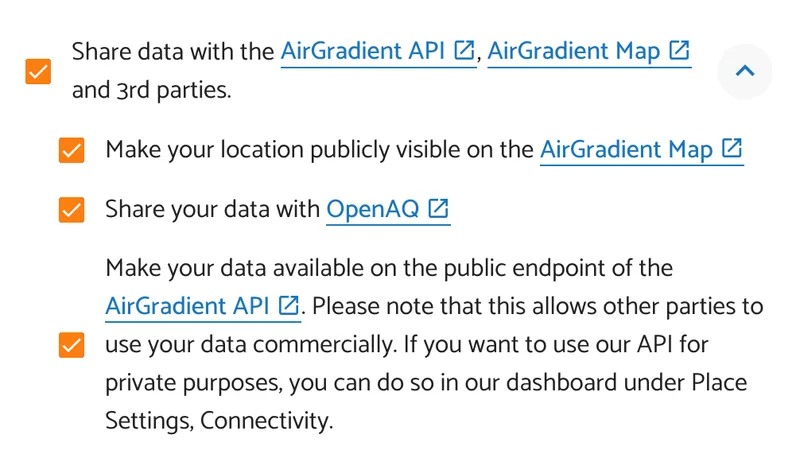
8 - If you do choose to share your data publicly, you will need to enter a public name for the location and location coordinates.
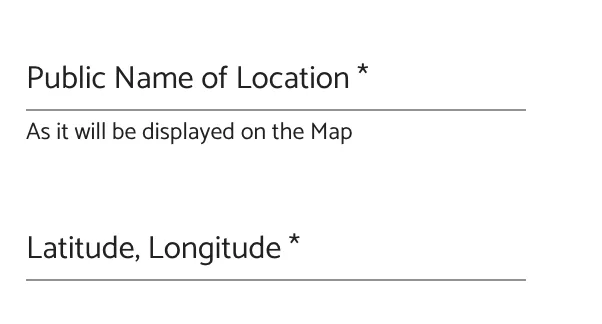
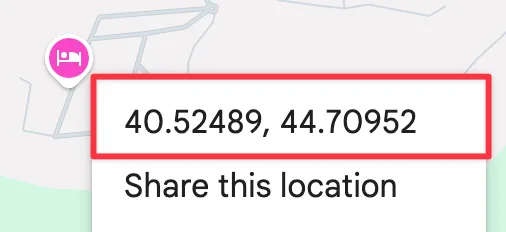
You can copy the location coordinates from Google Maps by right clicking on a location. The coordinates should be at least 4 decimal points long:
Note: If you’re sharing data with OpenAQ the public name of the location will need to be unique. Locations with common names can have problems displaying on the OpenAQ side.
9 - Finally, scroll down and click Add.
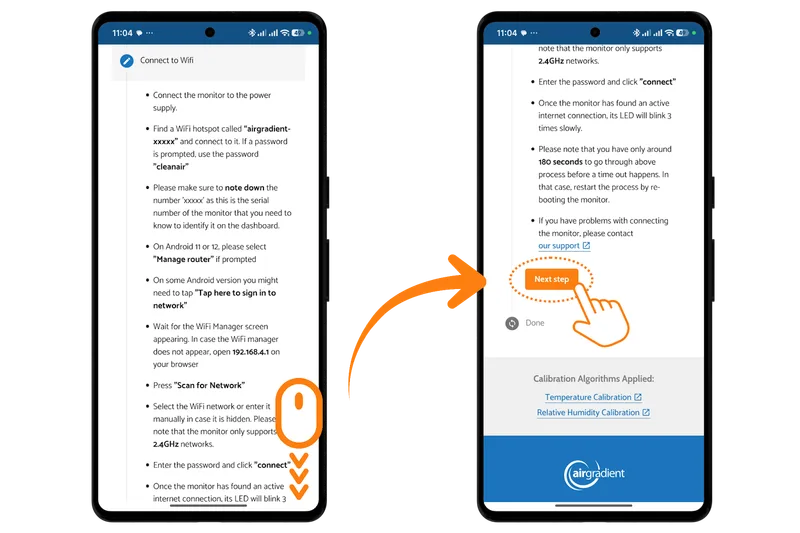
10 - You will next be provided with the steps to connect the device to your WiFi network. If you’ve already connected the device to your network, you can skip this step and click Next Step. Finally, click To Dashboard.
The monitor will now appear in your dashboard. You should see an entry for the monitor on your dashboard, but it will likely show as offline for the first minute or two. Please allow up to five minutes for the monitor to show as online and for the data to begin reporting.
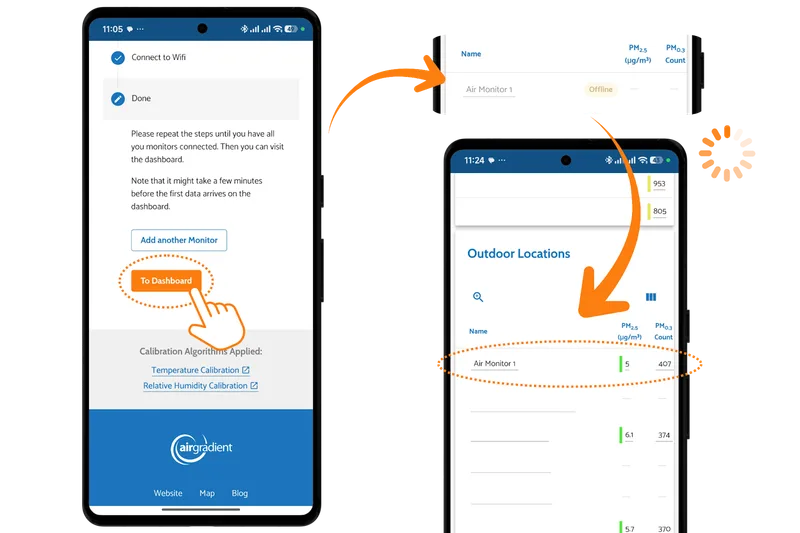
If you don’t begin to receive data after five minutes, please confirm that the serial number is correct.

Adding an additional monitor to an existing dashboard
If you already have an AirGradient dashboard and the device is already connected to Wi-Fi:
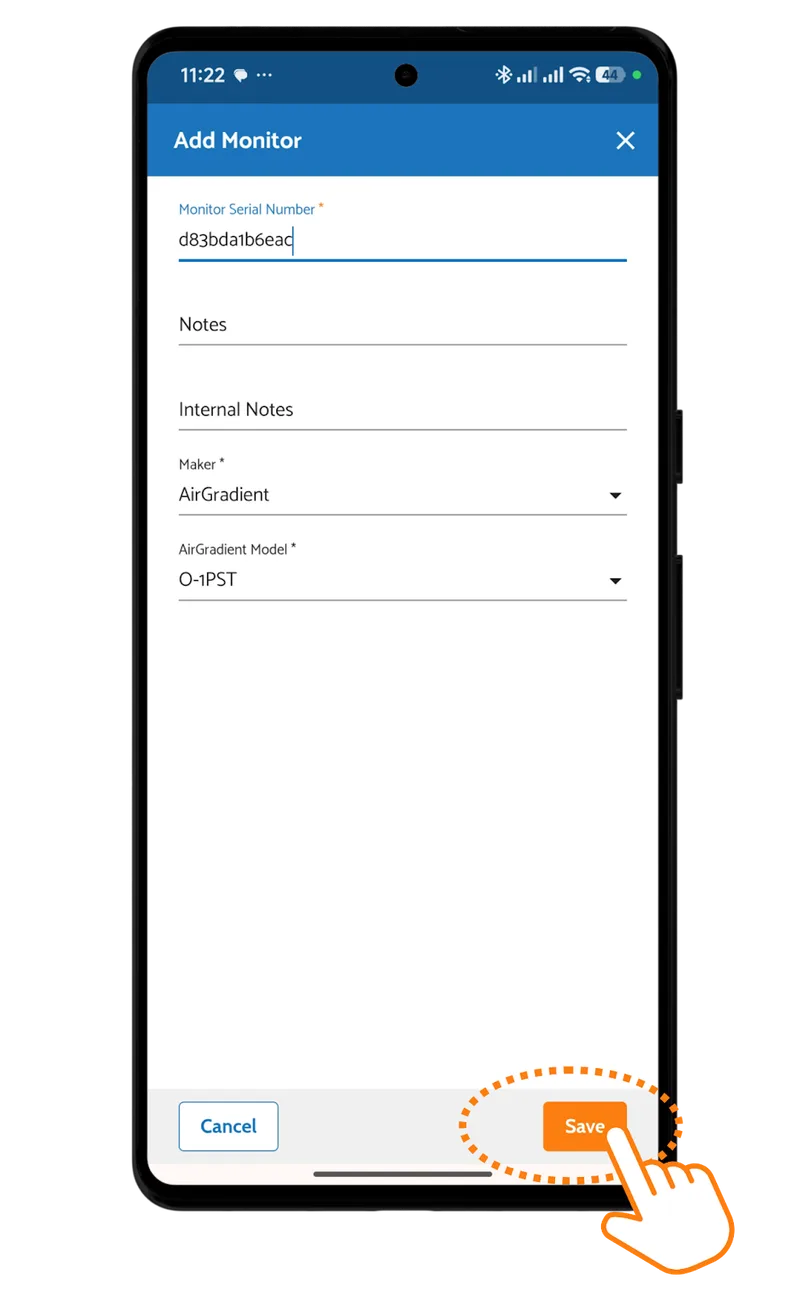
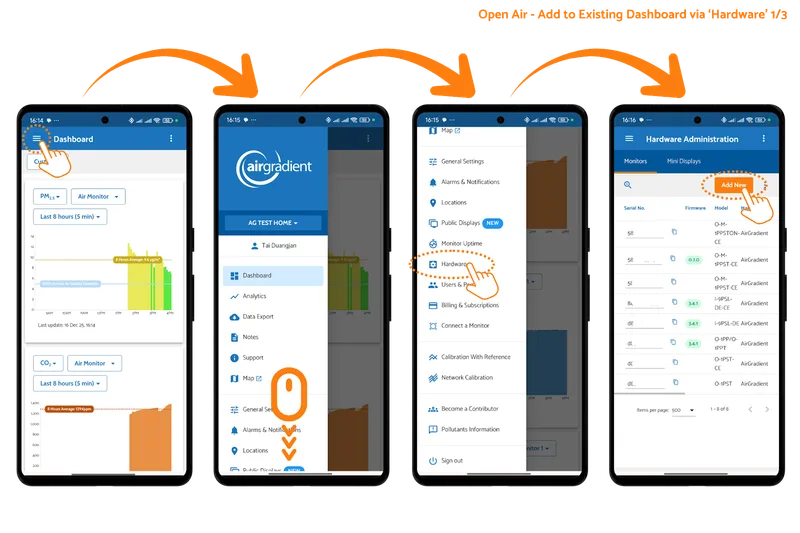
1 - Go to Dashboard > Hardware
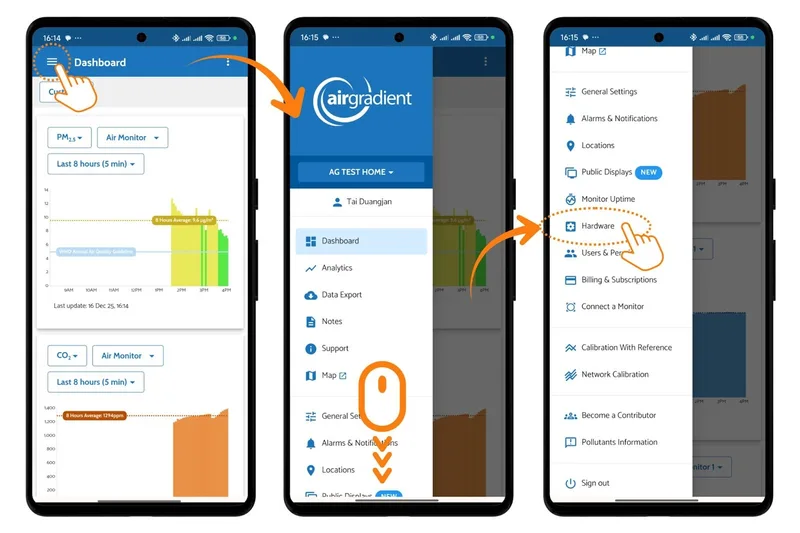
2 - Click Add New

3 - Enter:
Serial number
Maker: AirGradient
Model number
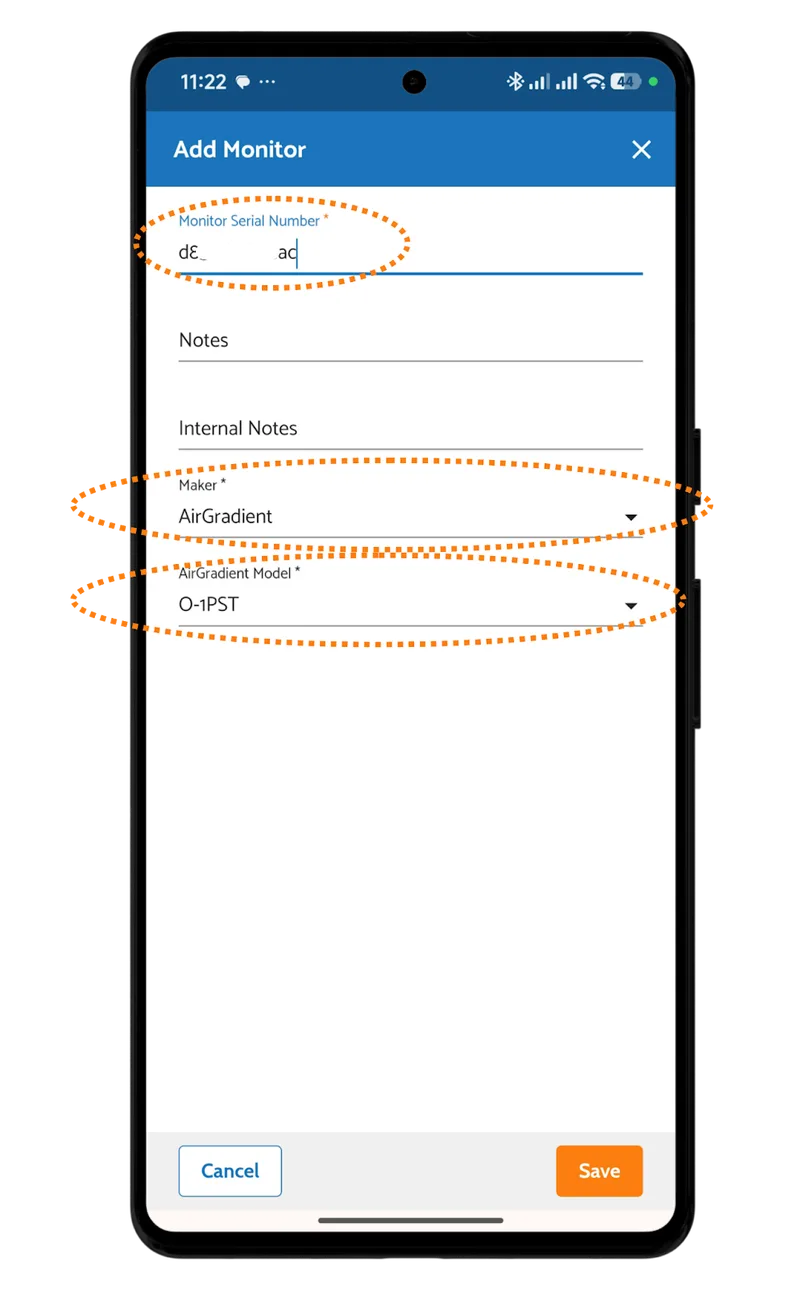
4 - Click Save
Please note that adding a hardware entity alone is not enough. To see data, you must also create a Location and assign the monitor to that location.
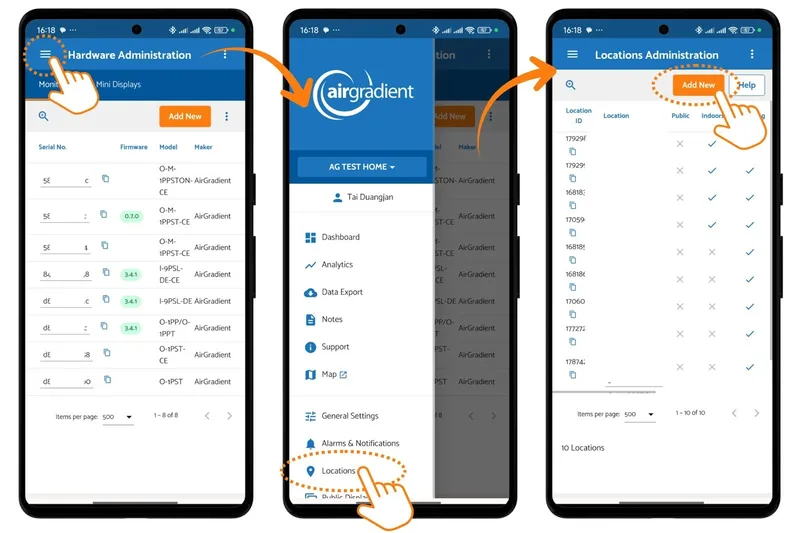
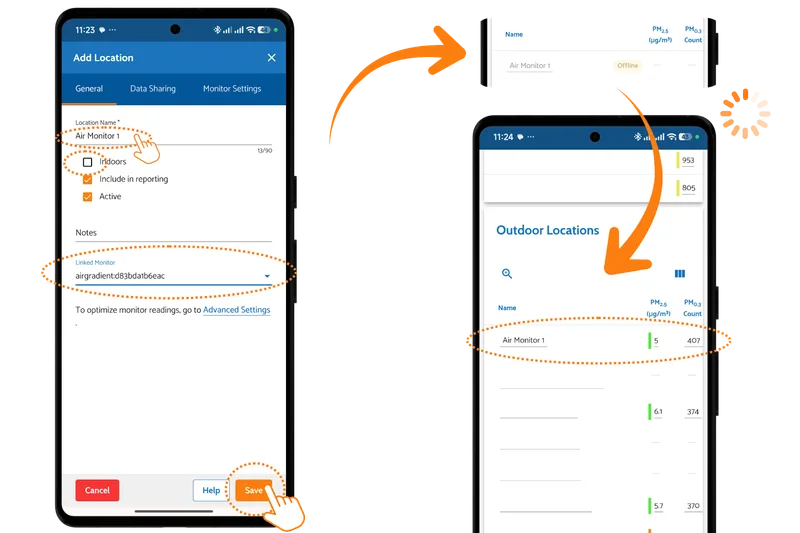
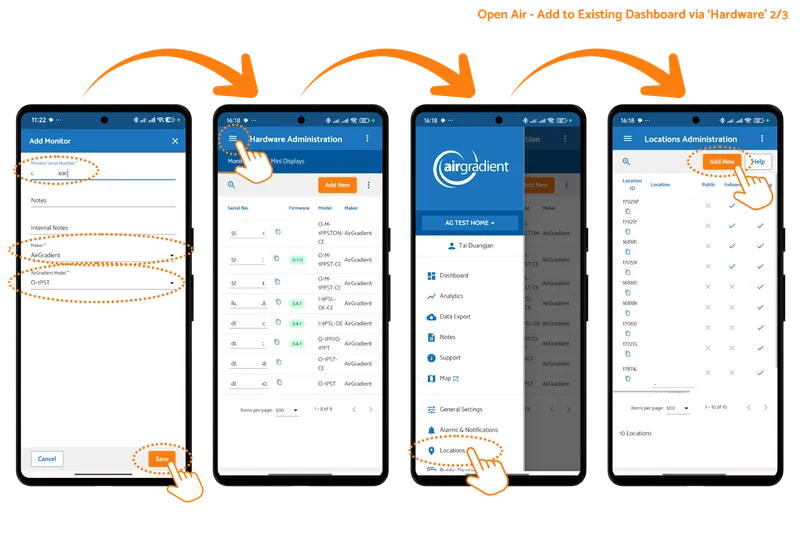
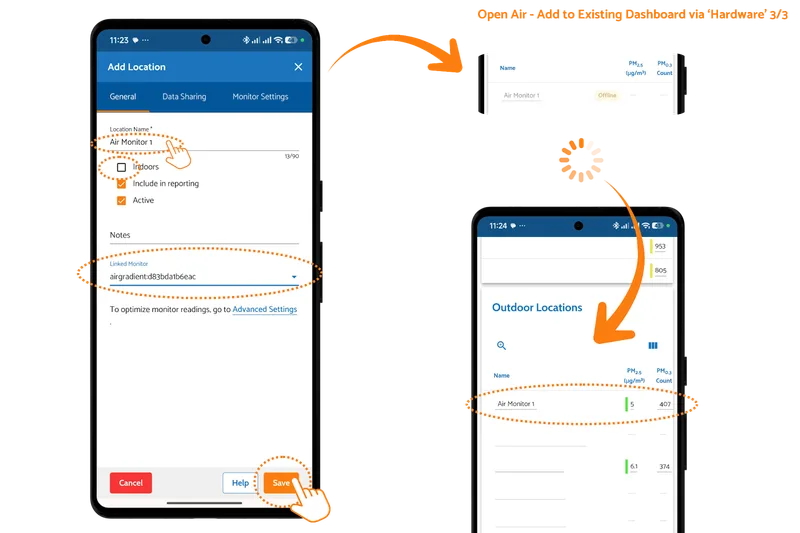
If a location is not created and linked to the hardware entity, the device will appear in the dashboard but you will not see any data until you also create a Location and tie the monitor to that location.